“Tailoron - React Native Mobile App” Documentation by “Amentotech”
“Tailoron - React Native App”
Created: 14/08/2021
By: Amentotech
Email: help.amentotech@gmail.com
Support: Create Ticket
Thank you for purchasing our mobile APP. If you have any questions that are beyond the scope of this help file, please feel free to email via our user page contact form here. Thanks so much!
Table of Contents
Download - top
Upon downloading the zip package file from Codecanyon, you'll have all files you need inside. Zip package contains the following files...
Files in tailoron-main-files.zip
Please make sure you have installed Android Studio , Xcode , VScode , jdk(8) and node.
- tailoron_react_native.zip - App Source code
- documentation.zip folder (It contains documentation for App)
You will have to integrate Tailoron app with firebase first then
- if you have already installed these then its ok otherwise install these:
- brew install yarn
- brew install node
- brew install watchman
- brew tap AdoptOpenJDK/openjdk
- brew cask install adoptopenjdk8
- Install Node
- Setup Visual studio code and project
- Run command "npm install" in Terminal and then run "npm install -g react-naitve-cli"
To use this app you must have visual studio code already installed.For more information regarding installing the visual studio code, please visit
Visual Studio CodeAfter Installing visual studio code, simply unzip app source code .zip file and open source code in visual studio code.
App Configuration - top
Please follow the firebase official documentation for integration:
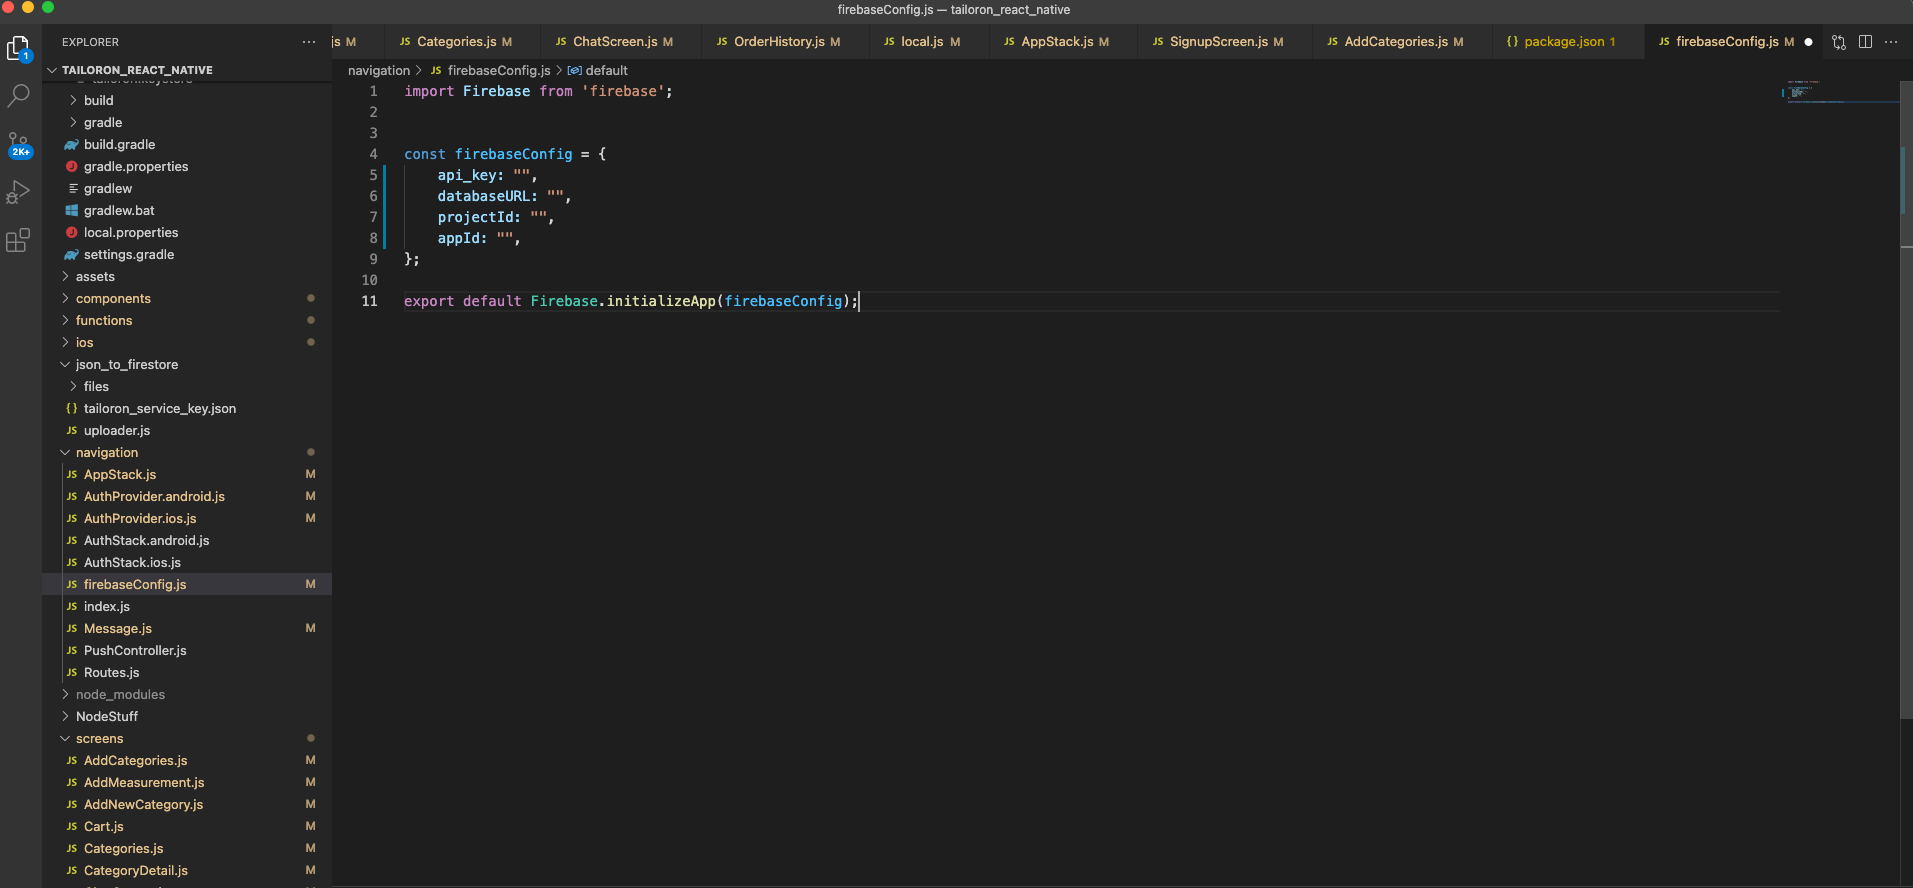
After integrating the app with firebase go to firebaseConfig.js file and fill the required information.
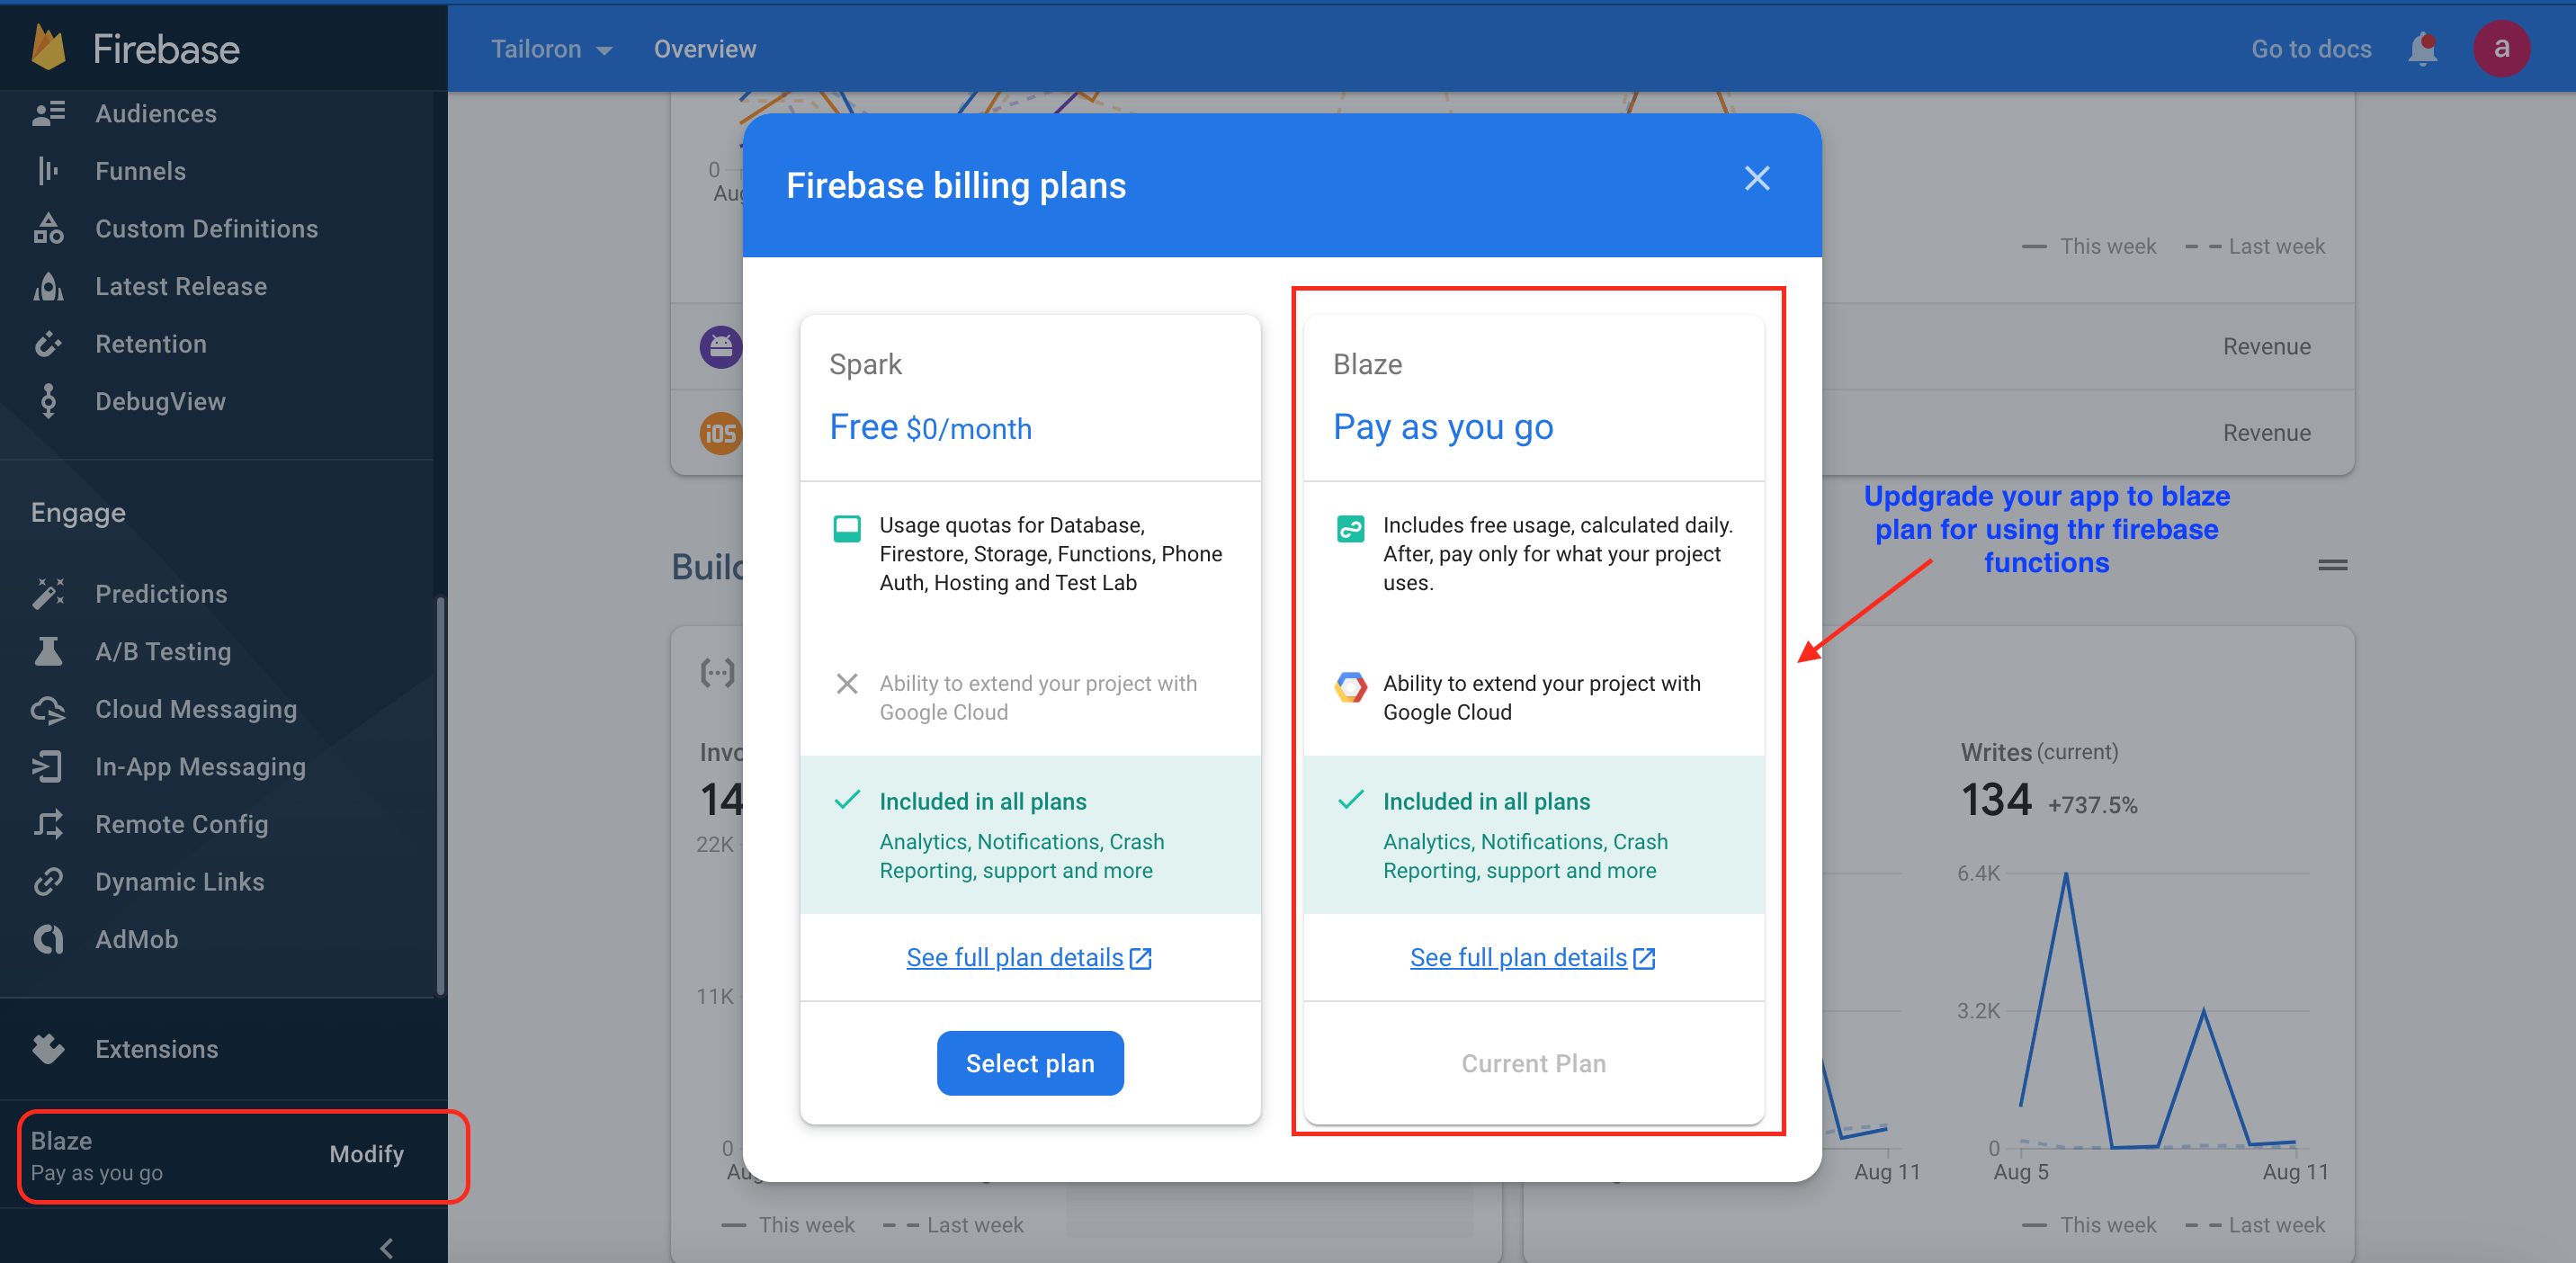
Integrate the firebase cloud functions in the app
Firebase cloud functions integration guide (official)Before using the firebase cloud functions you need to upgrade blaze plan.
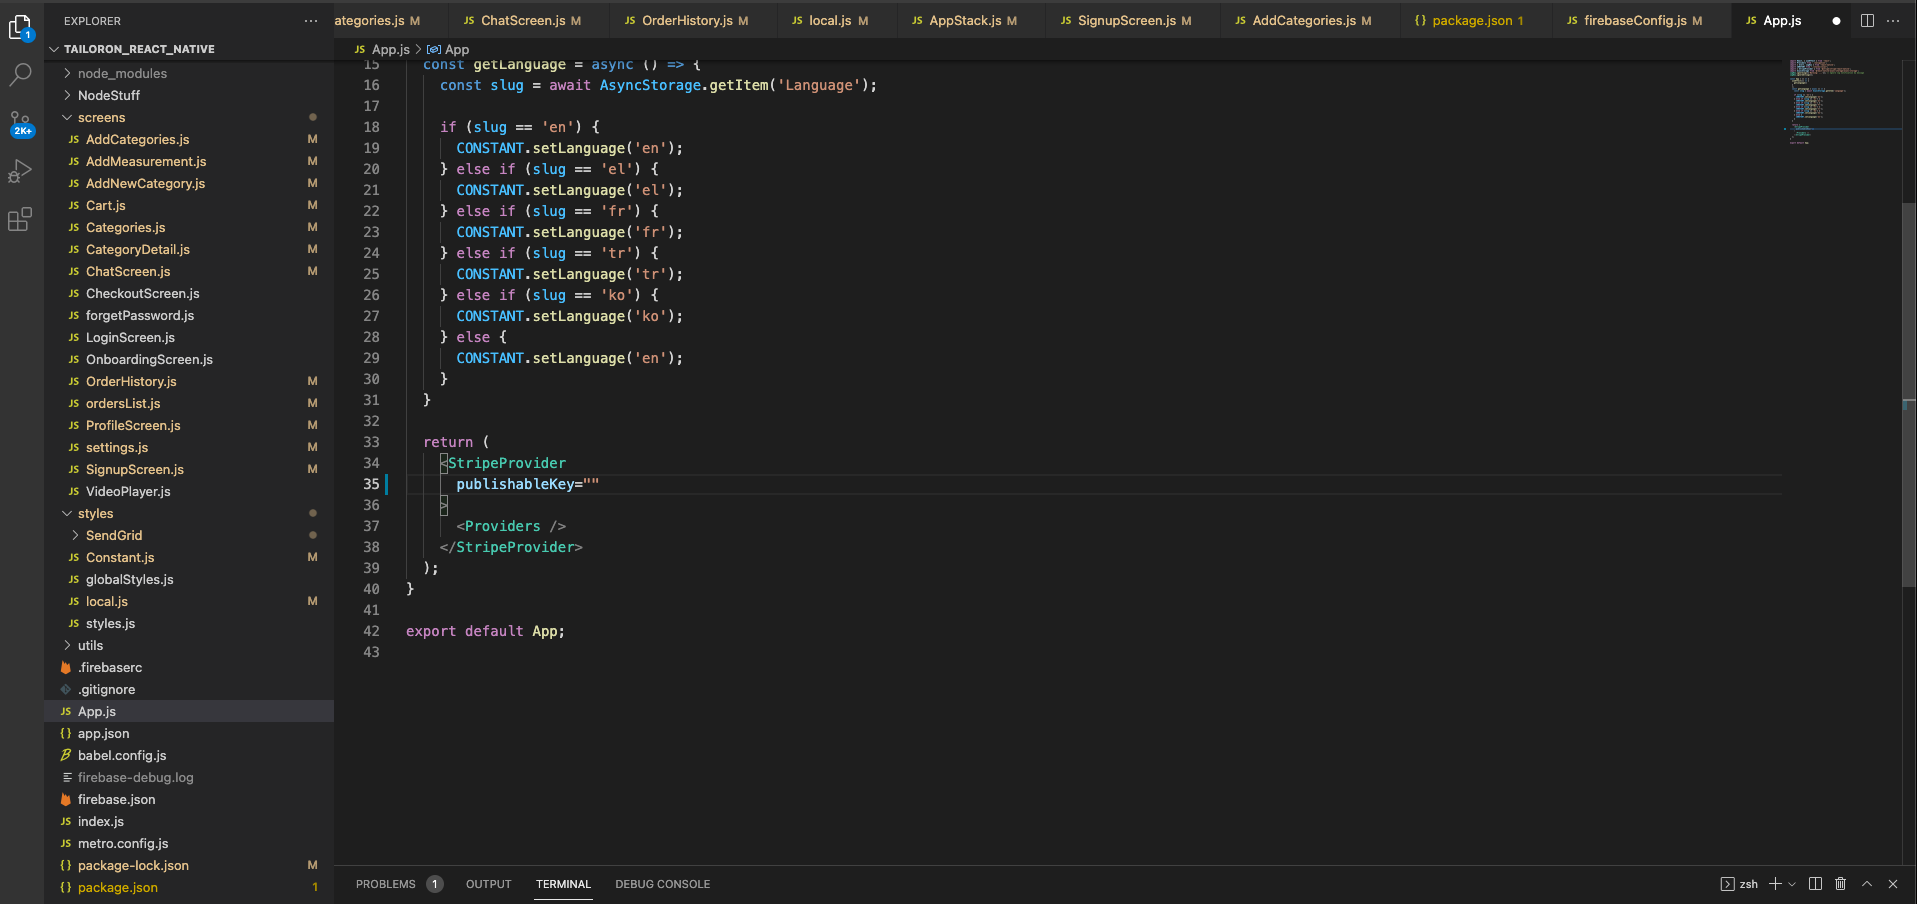
Integrate stripe in the app
Before using the stripe create an account and get the publish_key and secret_key from stripe dashboard.
Add the Publish_key in App.js file follow the below image.
After adding the publish_key you need to add the secret_key through this command at the root directory of the project:
firebase functions:config:set stripe.secret_key = your-secret key
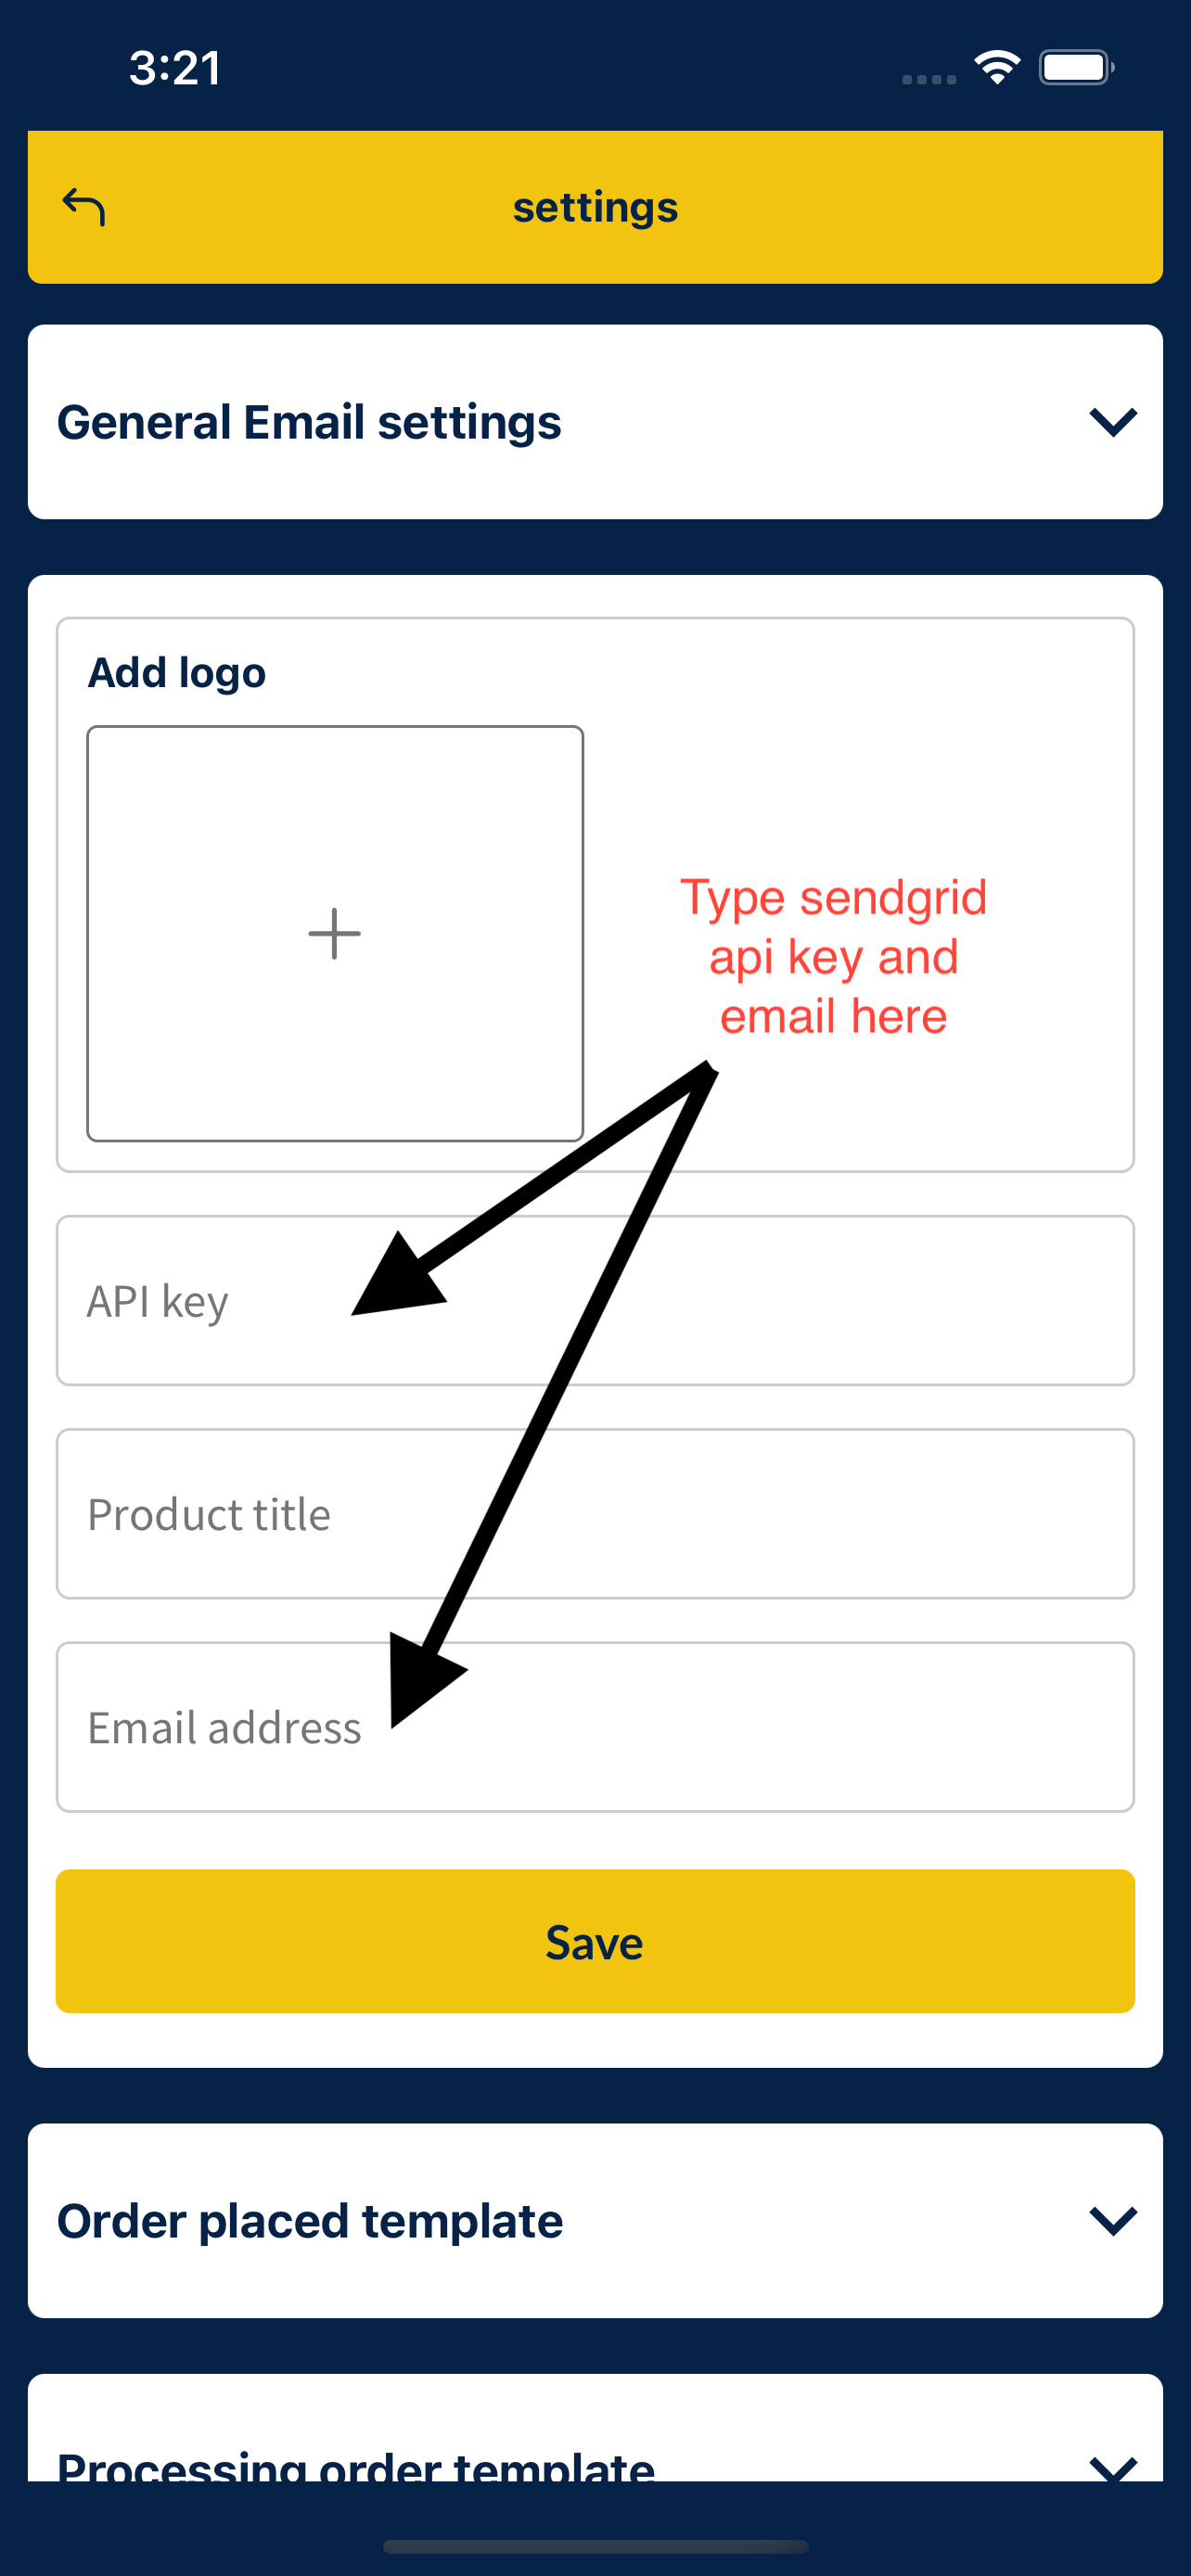
Follow the stripe integration guide (official)Integrate SendGrid with your app. Create a SendGrid account and register an email there. Add your api key and regisered email thorugh the app.
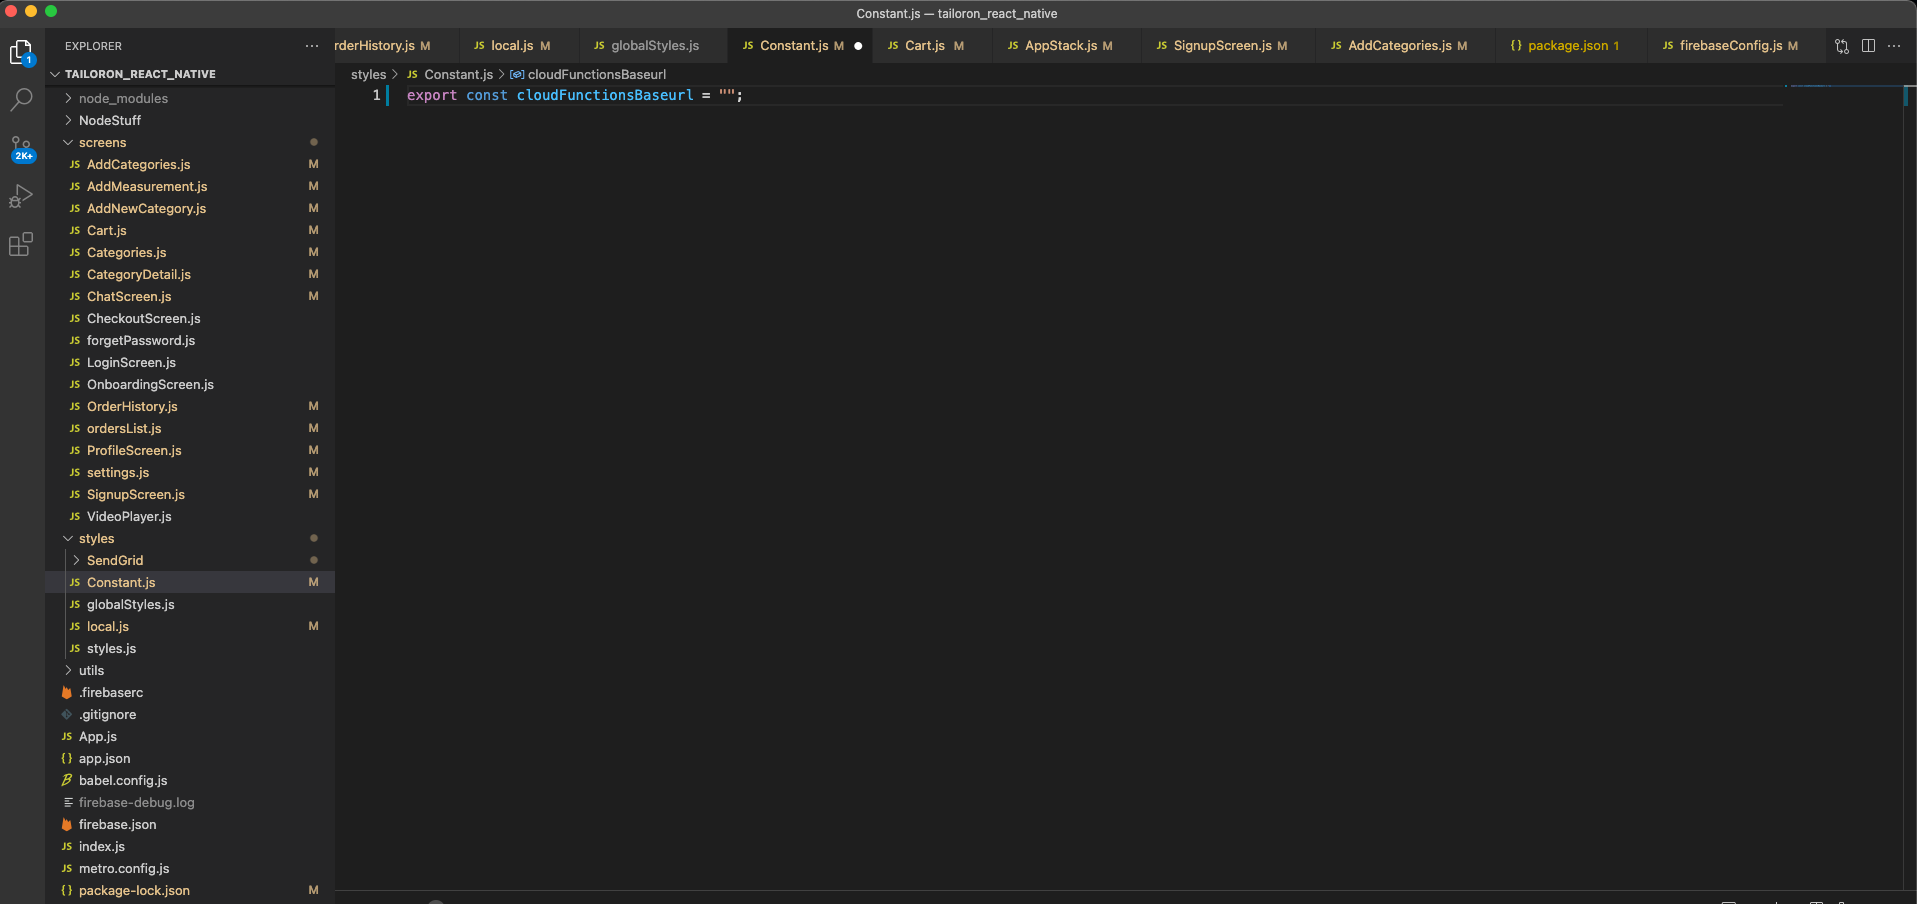
Add the cloud function url here
General Settings - top
- Change App Name for Android
- Change App Name for Ios
- Change App Icon for Android
- Change App Icon for Ios
- change_packagename for Android
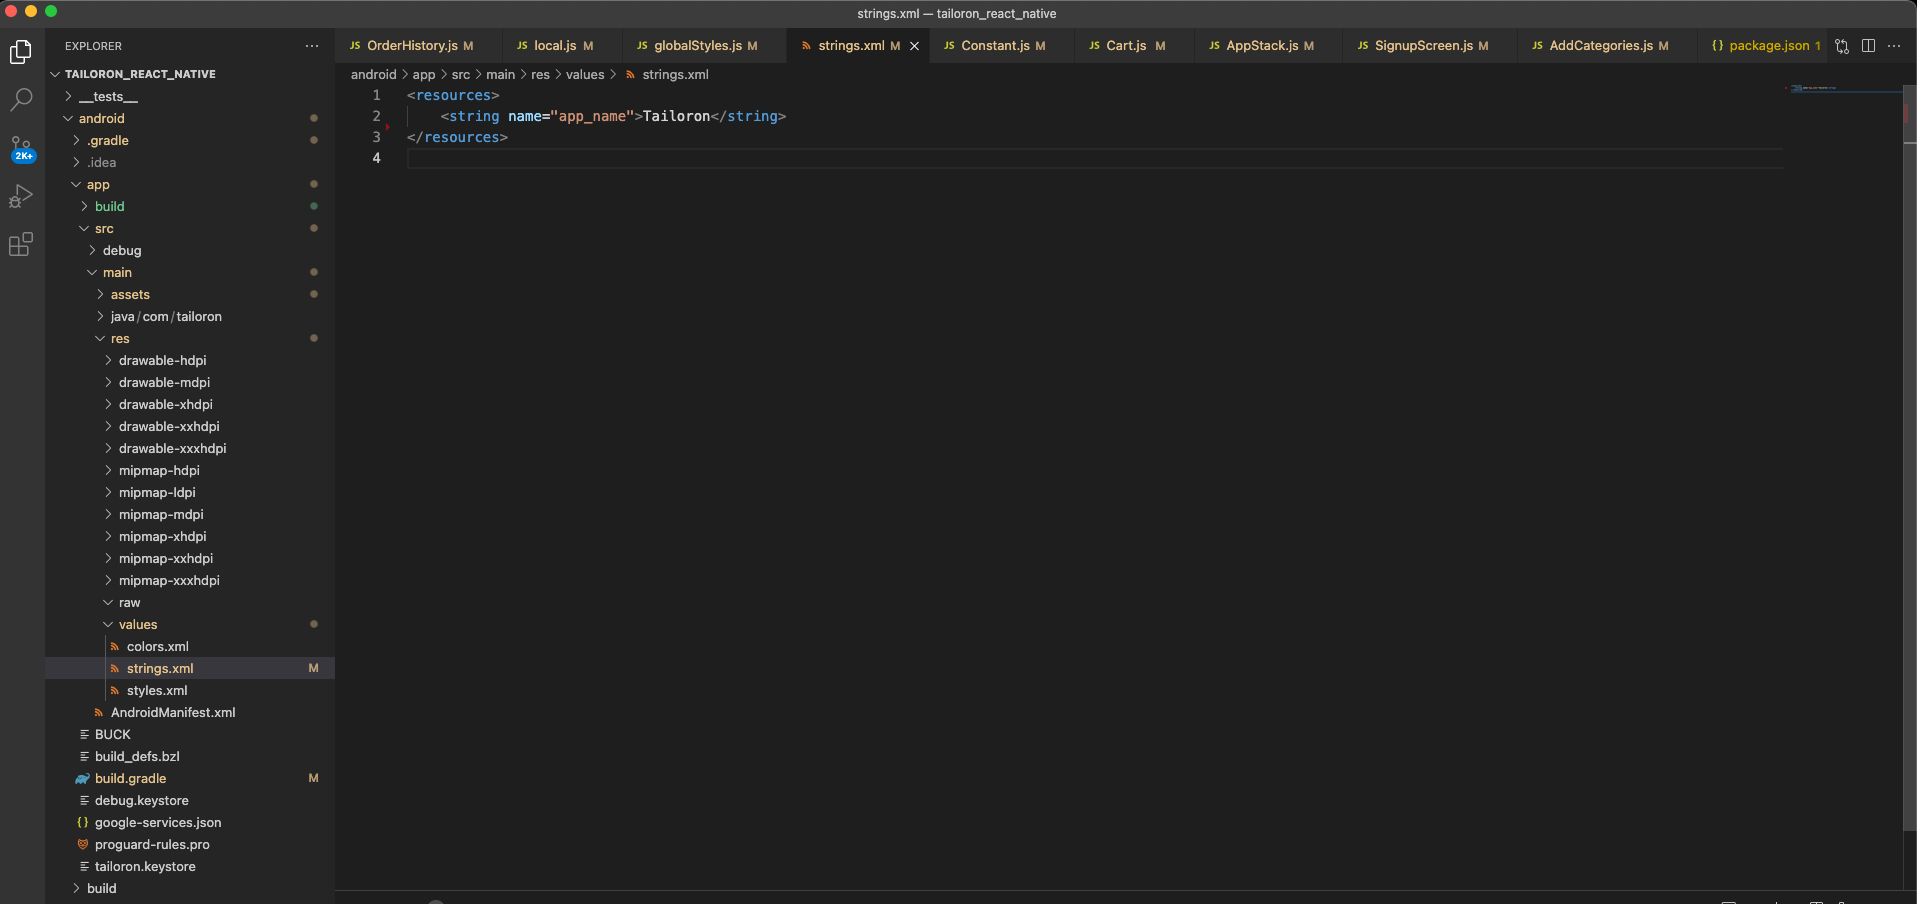
To change app name, open android/app/src/main/values/string.xml file and replace app_name key value.
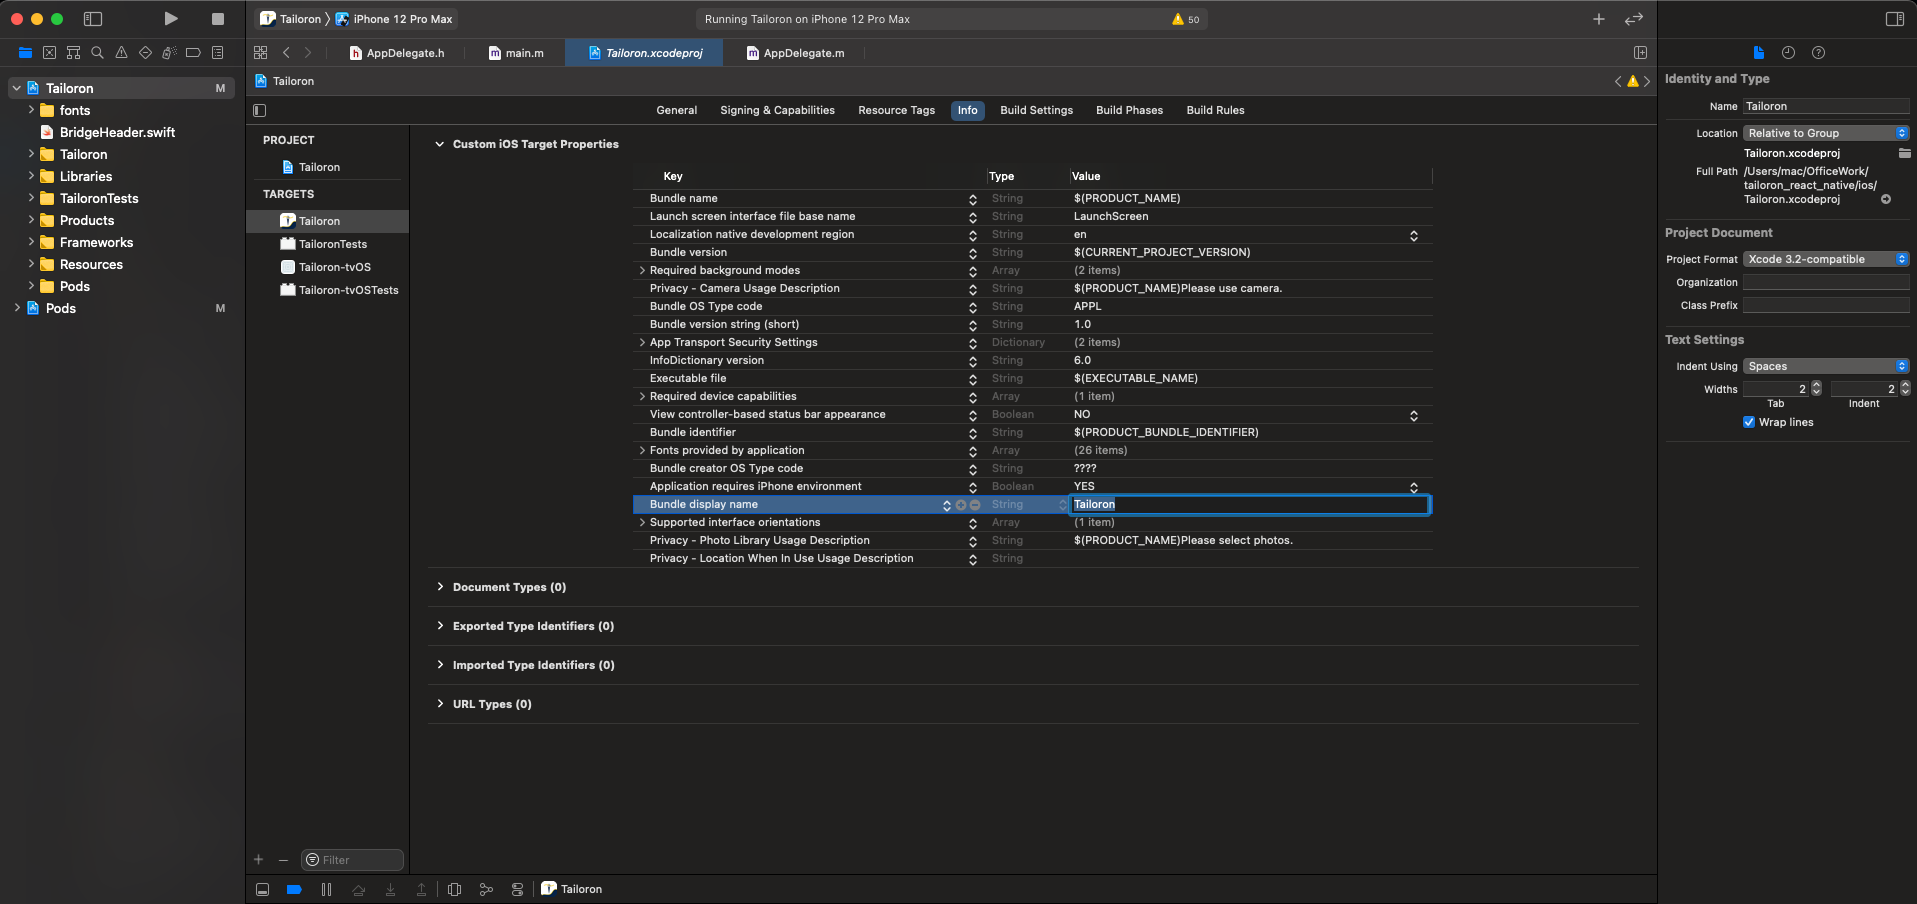
To change app name, open Xcode under info section
To change app icon, go to android/app/src/main/res/mipmap and replace all mipmap images with your logo
To change the application icon for the iOS copy all the content of AppIcon.appiconset from the ios>AppIcon.appiconset directory of downloaded makeappicon zip. After copying all the icons from the downloaded icons paste the same in your projects AppIcon.appiconset directory (YourProject -> ios -> YourProject -> Images.xcassets -> AppIcon.appiconset) if it ask to replace the json then click yes to replace.
According to this This link
you can run this command from the start
react-native init yourProject -package "com.example.app"
But if you already generated your app via
react-native init yourProject
You can modify app name in file
android/app/src/main/res/values/strings.xml
Then you can modify package name in files
android/app/src/main/java/com/reactNativeSampleApp/MainActivity.java
android/app/src/main/java/com/reactNativeSampleApp/MainApplication.java
android/app/src/main/AndroidManifest.xml ( optional as per my experience )
android/app/build.gradle
Lastly, run the following commands (from inside the app's android/ directory)
./gradlew clean
./gradlew assembleRelease
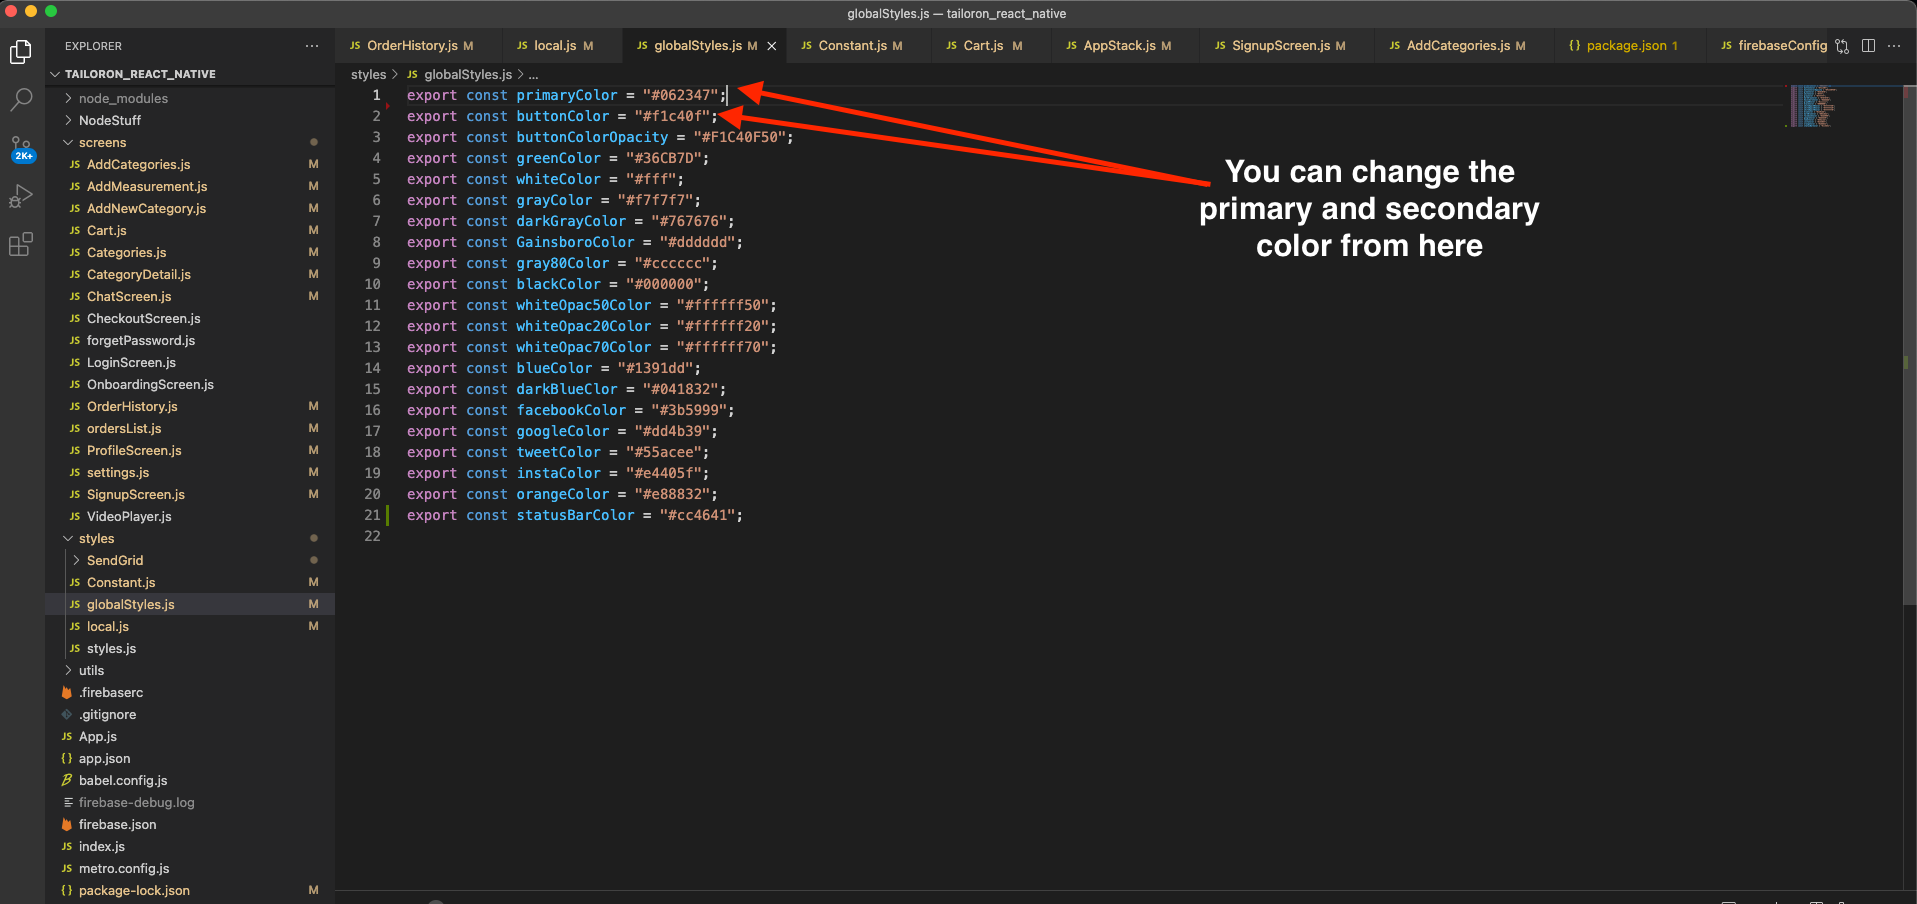
Styling
You can add your change color in globalStyles.js file
Release Build - top
For Android:
You can generate build for Android run this command first
react-native bundle --platform android --dev false --entry-file index.js --bundle-output android/app/src/main/assets/index.android.bundle --assets-dest android/app/src/main/res
then in terminal run this comamnd
react-native run-android --variant=release
you can find release apk file from android/src/main folder in project
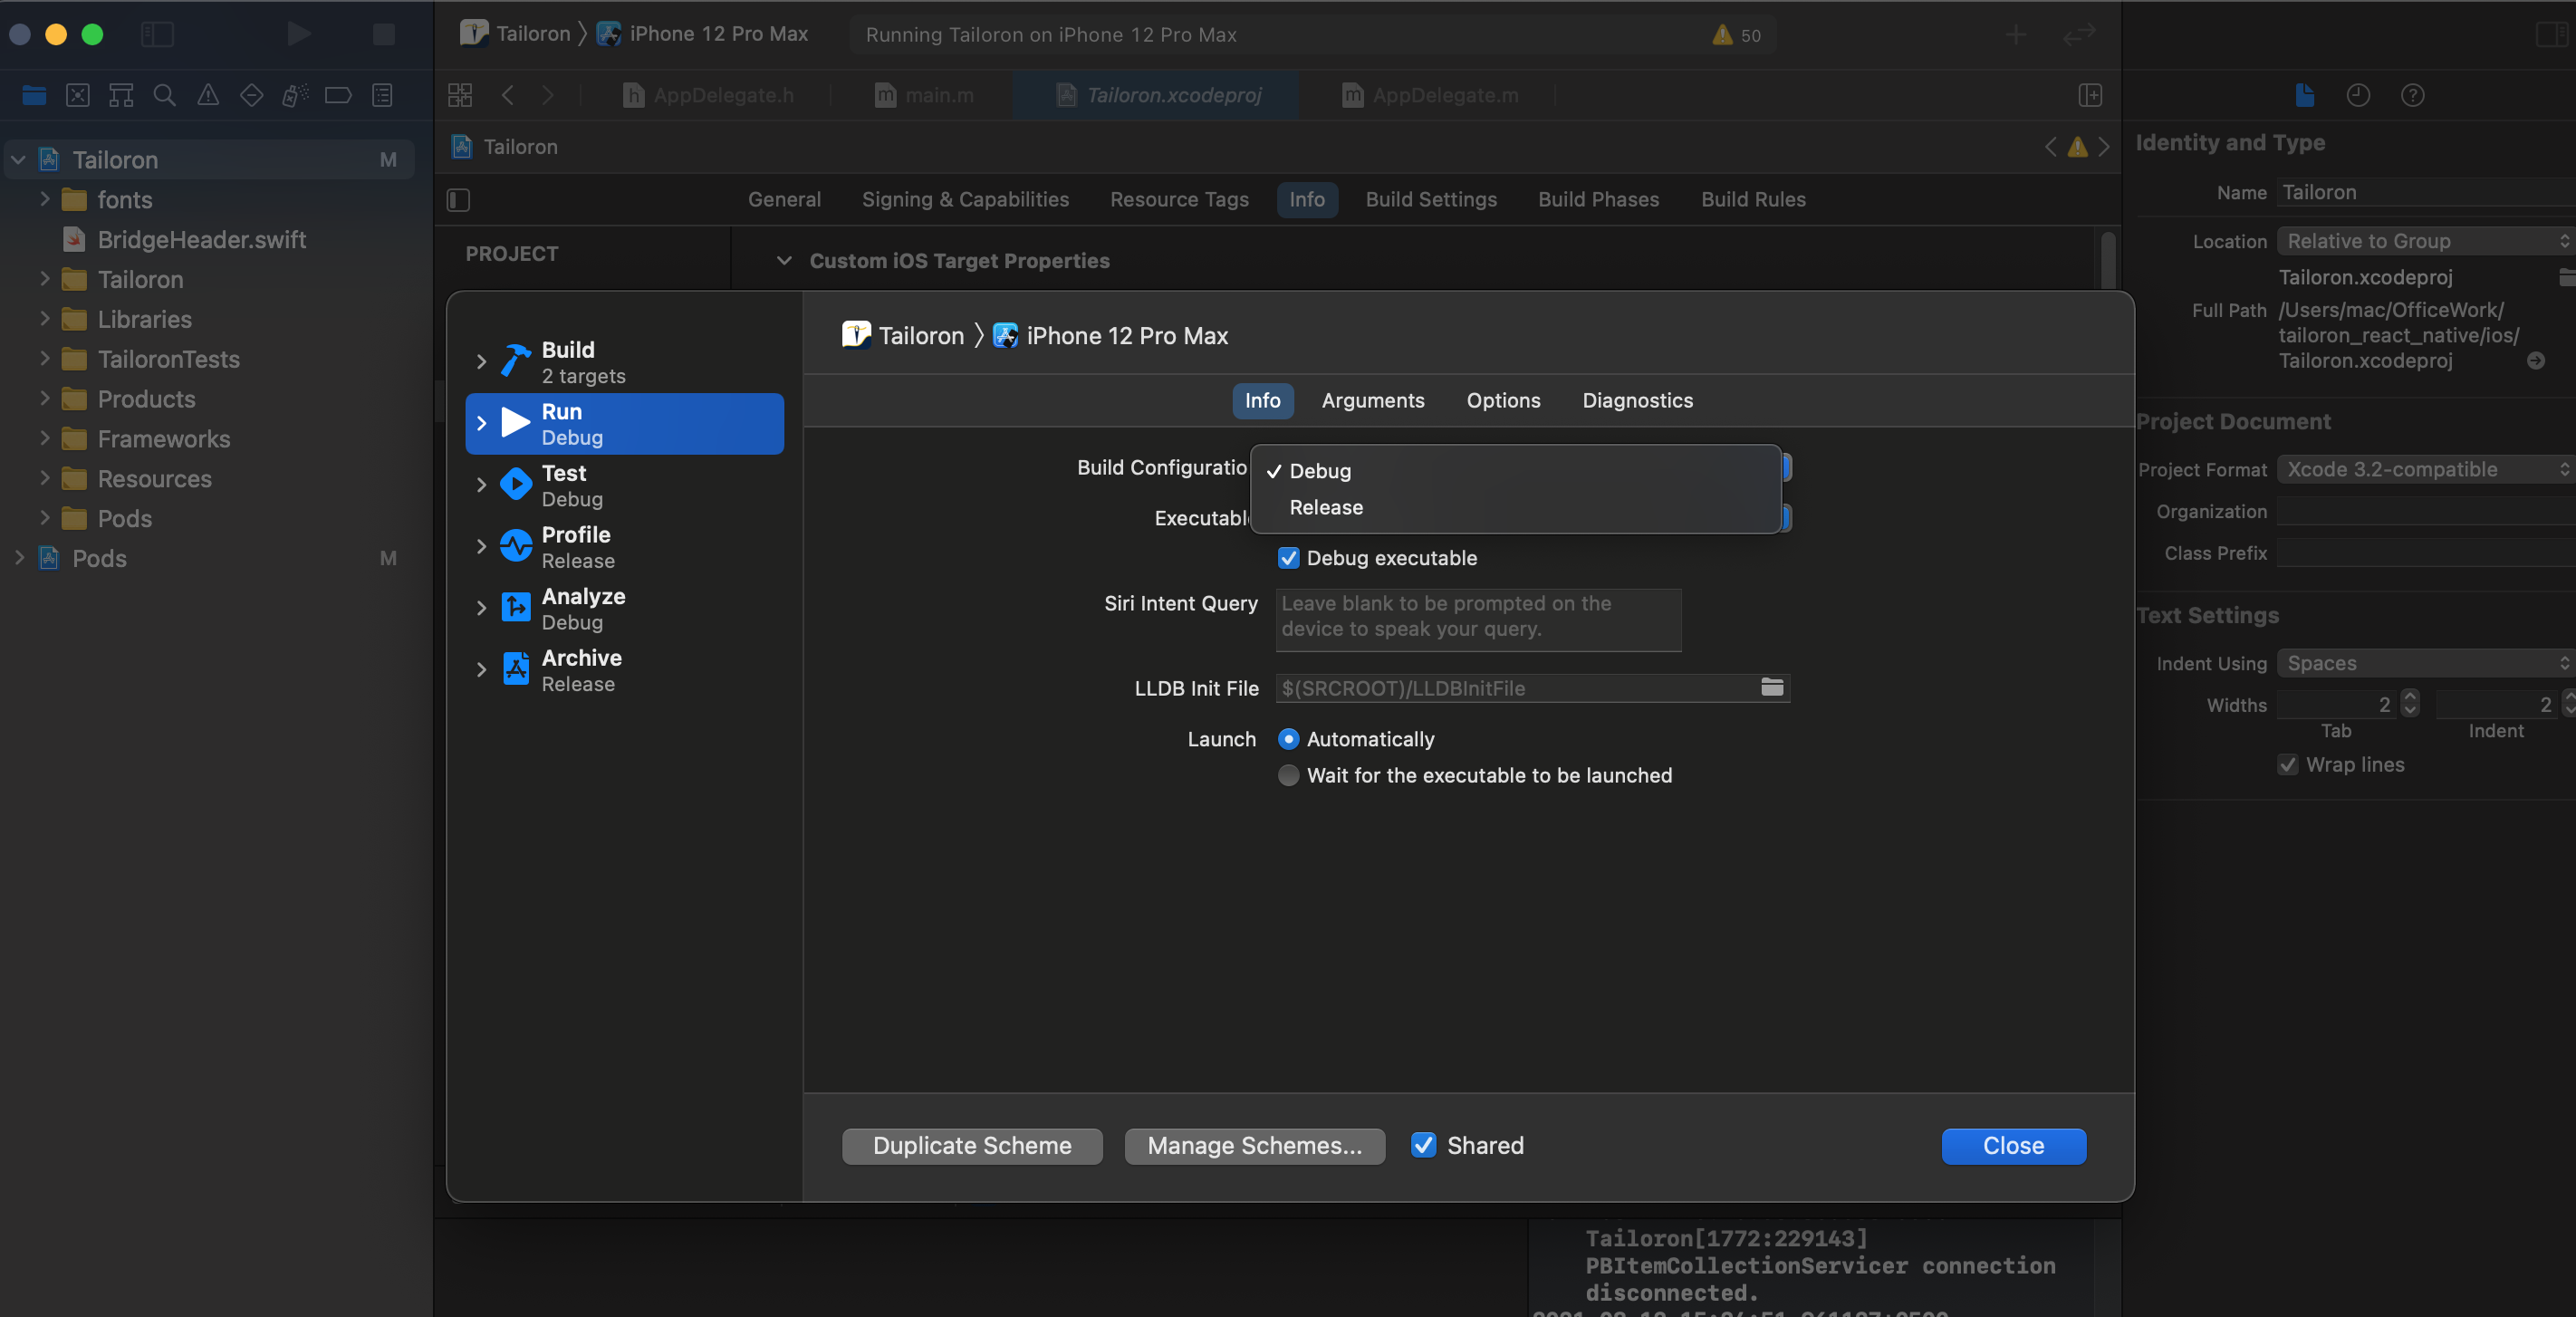
For Ios:
You have to make some changes in Xcode. First you need to purchase Apple Developer Account then after it go to your Xcode product/scheme/edit scheme and change Build Configration form Debug to release.
Since version 1.0 - top
Released on 14 August, 2021