“Taskbot” Documentation by “Amentotech”
“Taskbot”
Created: 22/12/2021
By: Amentotech
Email: help.amentotech@gmail.com
Support: Create Ticket
Thank you for purchasing our plugin. If you have any questions that are beyond the scope of this help file, please feel free to email via my user page contact form here. Thanks so much!
Table of Contents
Download - top
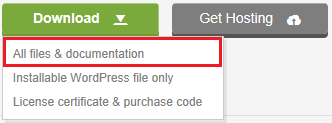
Upon downloading the zip package file from Themeforest, you'll have all files you need inside. Zip package contains the following files and
- taskbot.zip contains the plugin
- documentation folder (It contains documentation for the plugin)
To install this plugin you must have a working version of WordPress already installed. For more information regarding installing the WordPress, please visit below mentioned URL
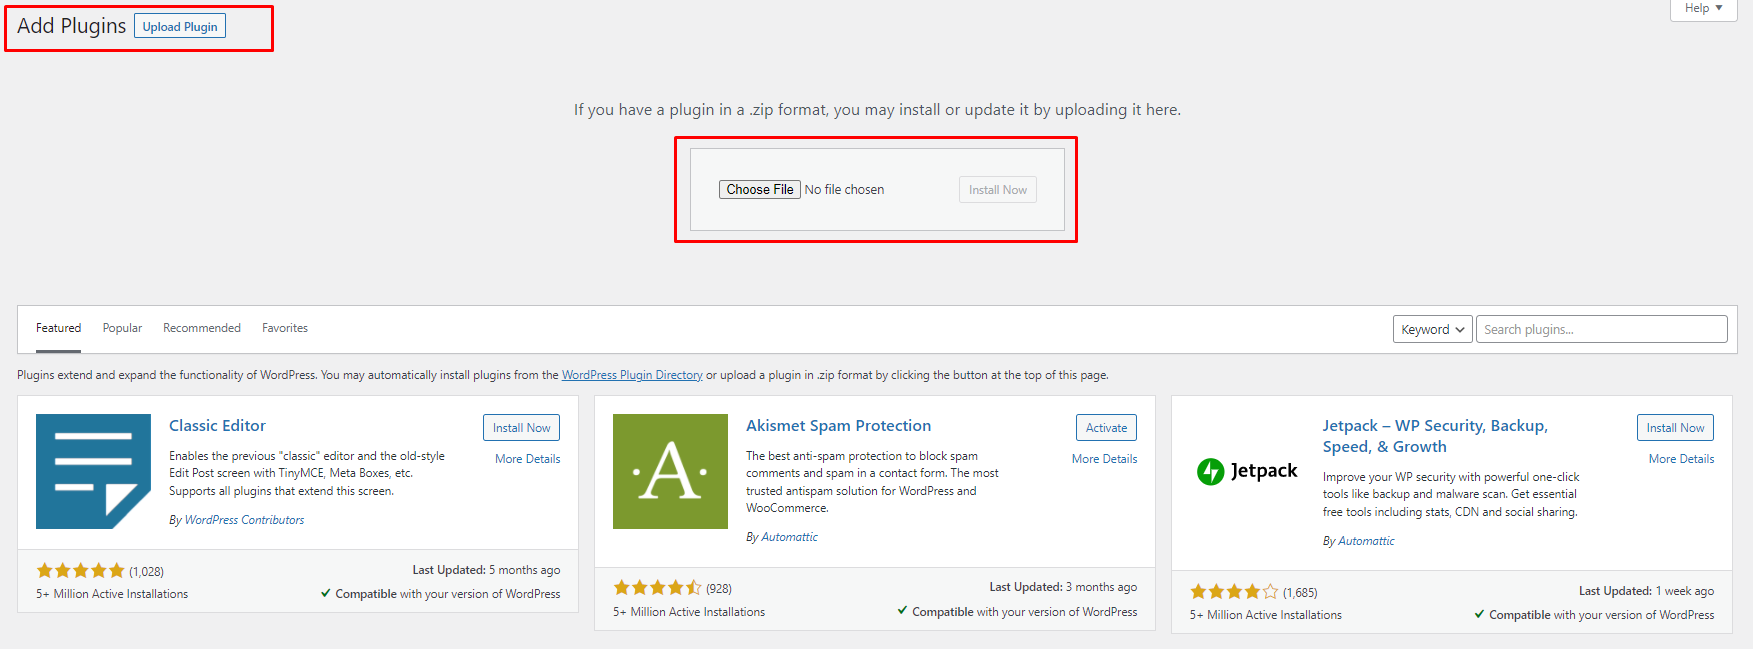
Installing pluginWhen you are ready to install a plugin, you must first upload the plugin files and then activate the plugin. For this purpose, unzip the file that you downloaded from themeforest and there you would find the (taskbot.zip) file and upload it via WordPress installer. The plugin files can be uploaded in two ways
Installation - top
Plugin upload
- Navigate to Plugins » Add New
- Click "Add New" button and finally hit the "Upload Plugin"
- Click on "Choose File" and find the "taskbot.zip" file on your computer and click "Install Now" button
- The plugin will be uploaded and installed.
- For Activating the plugin, Go to Plugins » Installed Plugins and activate the installed plugin
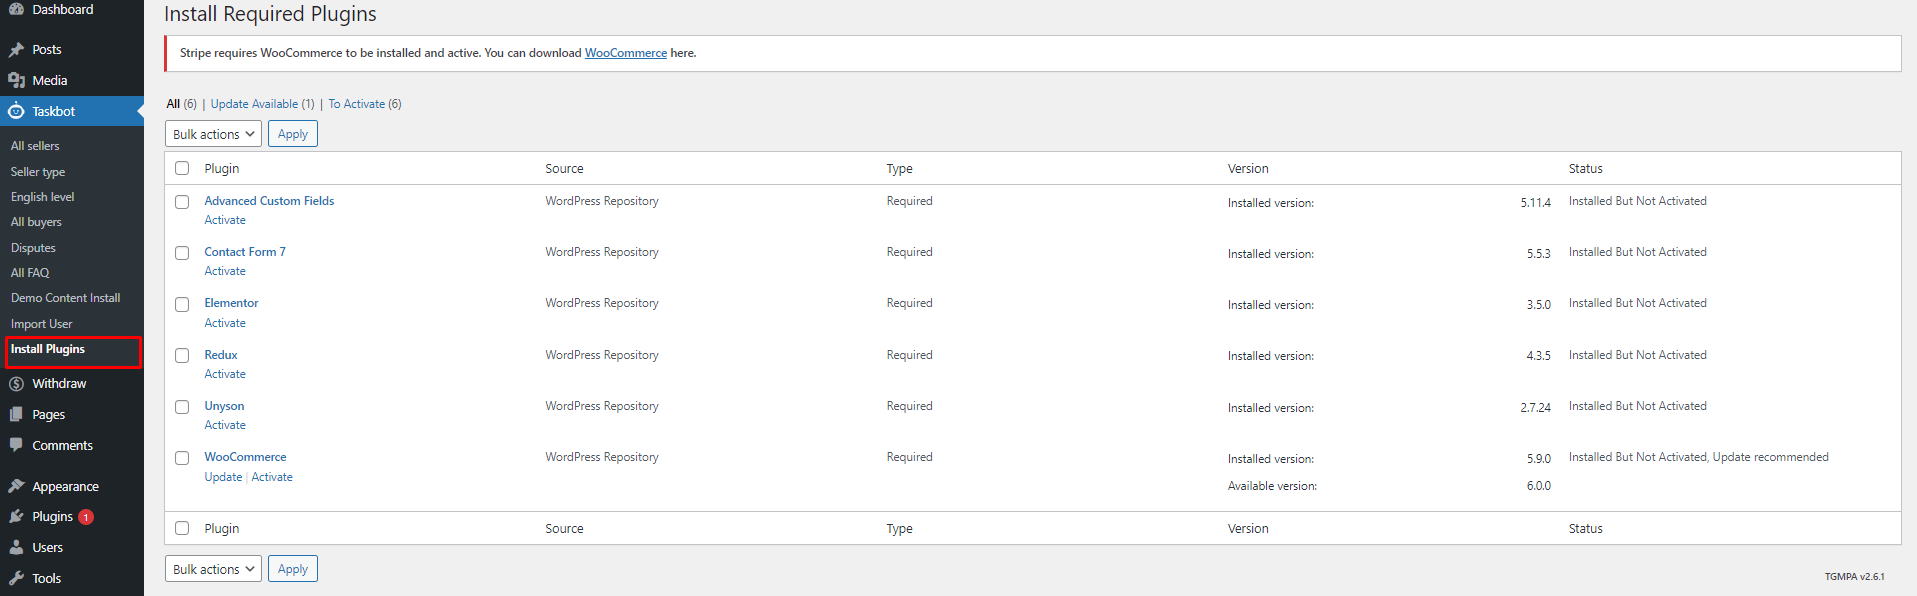
After Installation and activation of taskbot plugin you have to install required plugins more.
Required plugin installation
- Redux( Plugin settings ) required
- Elementor required
- Unyson optional Important: please deactive Unyson plugin after demo content import. This plugin is only to import demo contents
- Advanced Custom Fields required
- Contact Form 7 required
- WooCommerce required
You don’t need to download those plugins yourself.
Click on "Begin installing plugins" and simply select all plugins and install them.
Then activate the plugins with help of "Bulk actions":
Import demo contents
Before importing demo content, please make sure your server meet minimum server requirements to work smoothly with taskbot plugin.
- PHP Version Should be > 7.0
- PHP Zip extension Should be = Installed
- max_execution_time = 300
- max_input_time = 300
- memory_limit = 512
- post_max_size = 100M
- upload_max_filesize = 100M
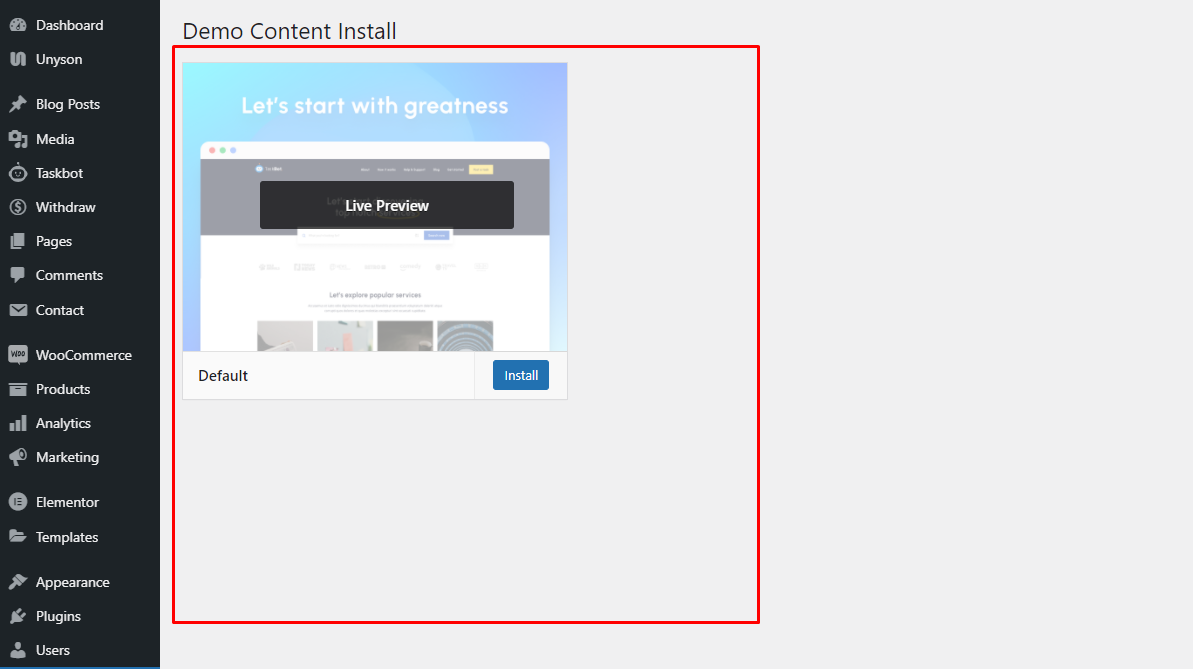
At this point plugins and required Unyson extension should be installed. To import demo content just follow below mentioned process.
Things you need to check to make demo installer work:
Go to unyson, take a look to compatible extension, you will see "Backup & Demo Content" extension.
Click on yes install the compatible extensions.

Step 1: Now go to Administrator » Taskbot » Demo Content Install and click the "Install" button. Now, wait for the demo content install process.
Step 2: Now go to Administrator » Taskbot » Import User and click the "Import Dummy" button.Now wait for demo users import process.
Congratulations!
Important: please deactive Unyson plugin which is no longer needed. This plugin is only to import demo contents.You’ve setup your plugin and ready to go.
Import users in bulk
Importing for bulk users (sellers, buyers) need to creat a CSV file with the following formates:
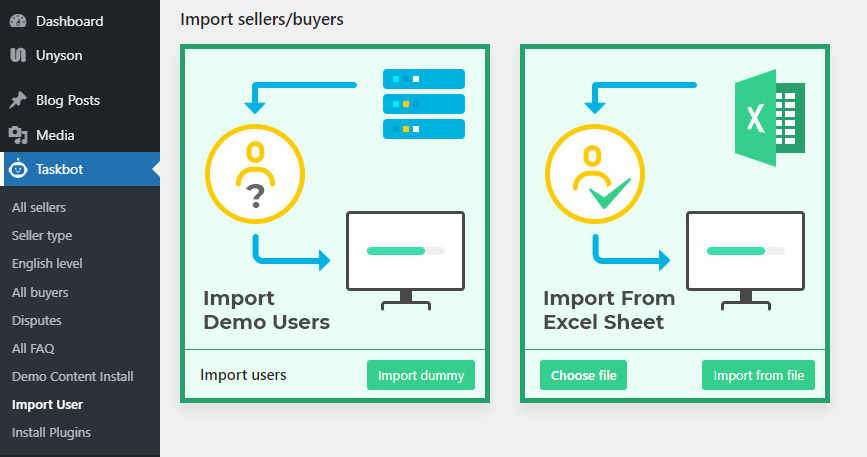
- user_nicename : It is required field.
- display_name : It is required field.It should be sanitize.please use without space and special character.
- show_admin_bar_front : It is required field.It should be FALSE.
- role : It is required field.it should be subscriber.
- _linked_profile : It is required field.It is profile id when user login as Seller.
- _linked_profile_buyer : It is required field.It is profile id when user switch to Buyer.
- tasks : It is required field.It is task id.
- wallet_order_id :It is required field.It is user wallet id.
- task_orders : It is required field.It is task id that buyer have hire.
- login_type :It is optional field.It would be sellers or buyers.
Templates settings - Top
In case the admin will not import demo content then the admin will also create a page manually and set the specific template for certain pages.
- Create add task page and assign the "Add task" template.
- Create dashboard page and assign the "User dashboard" template.
- Create administrator dashboard page and assign the "Administrator dashboard" template.
- Create search task page and assign the "Search task" template.
- Create search sellers page and assign the "Search sellers" template.
- Create pricing plans page and assign the "Pricing plans" template.
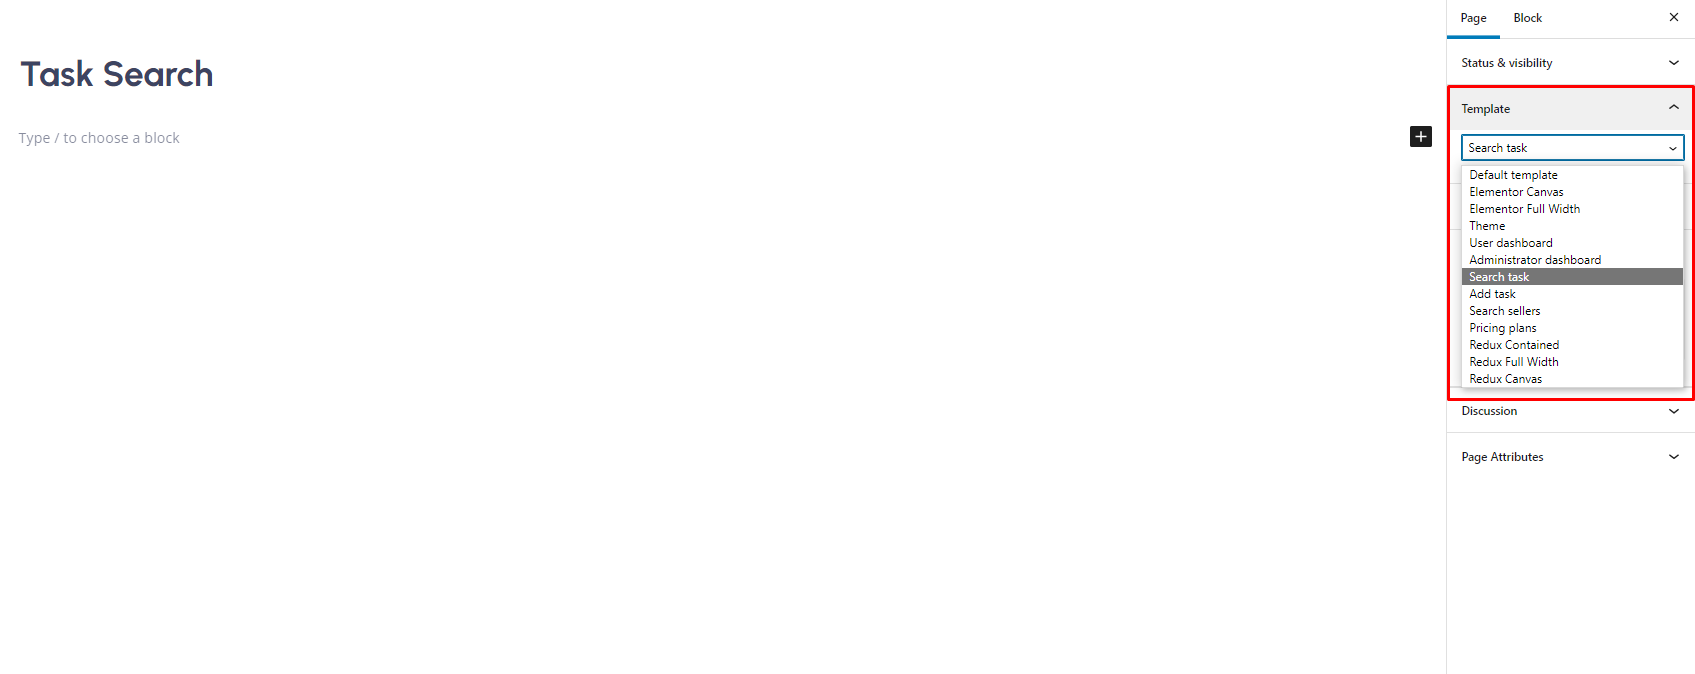
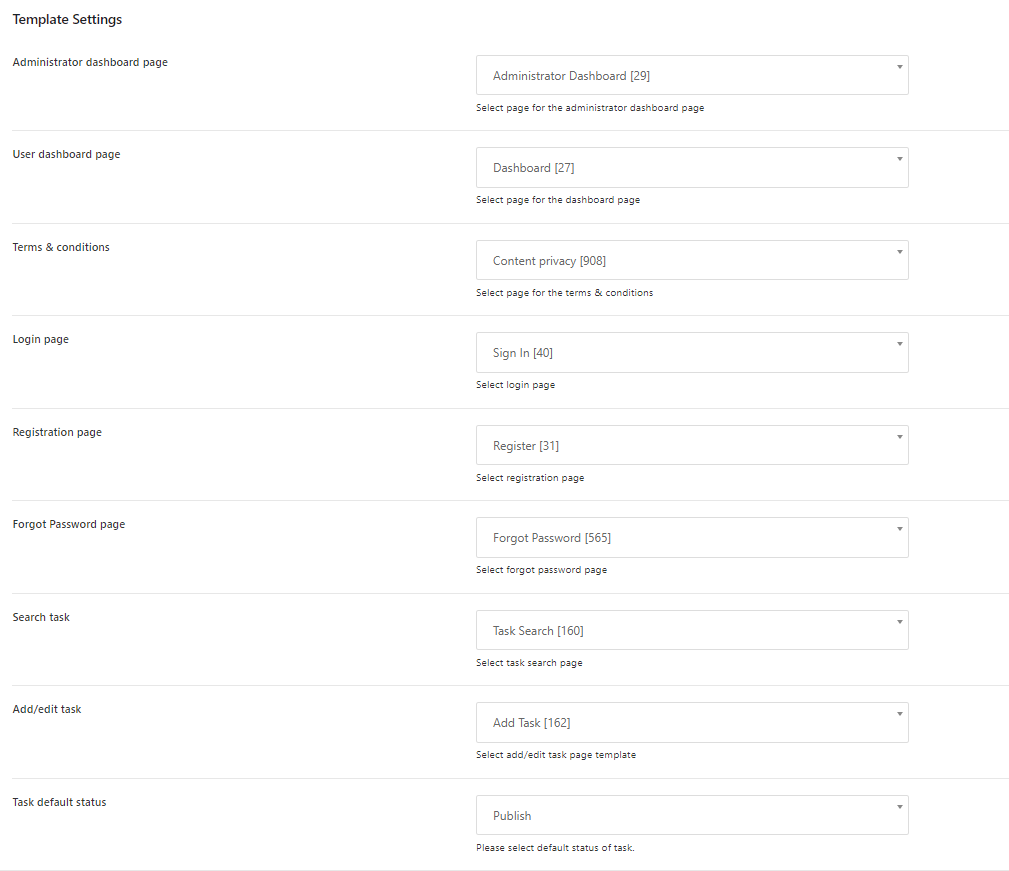
- Navigate to Administrator » Template Settings » choose respective pages.
Add ACF custom fields - Top
These custom fields will be used in "My task pricing" while adding task.
You can add custom fields in Administrator » Custom Fields » Add New.
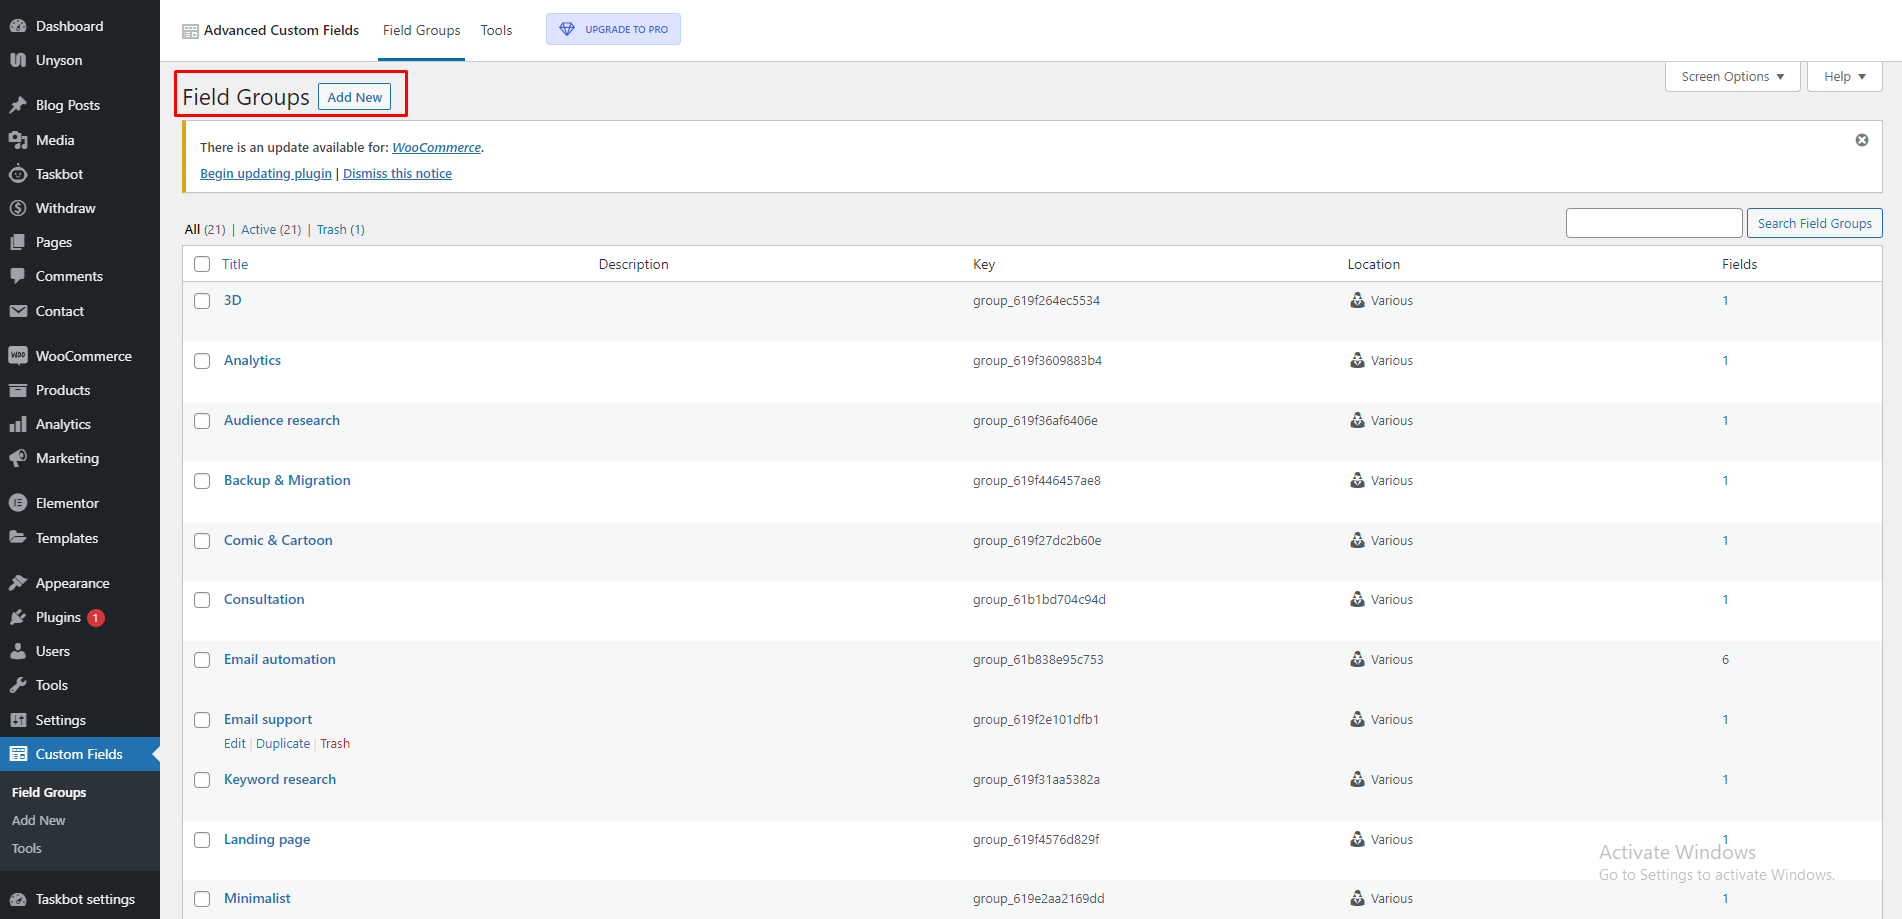
You can add field group by click on "Add New".
Here are following steps to add field.
Add field
By click on "Add Field" you can add fields.
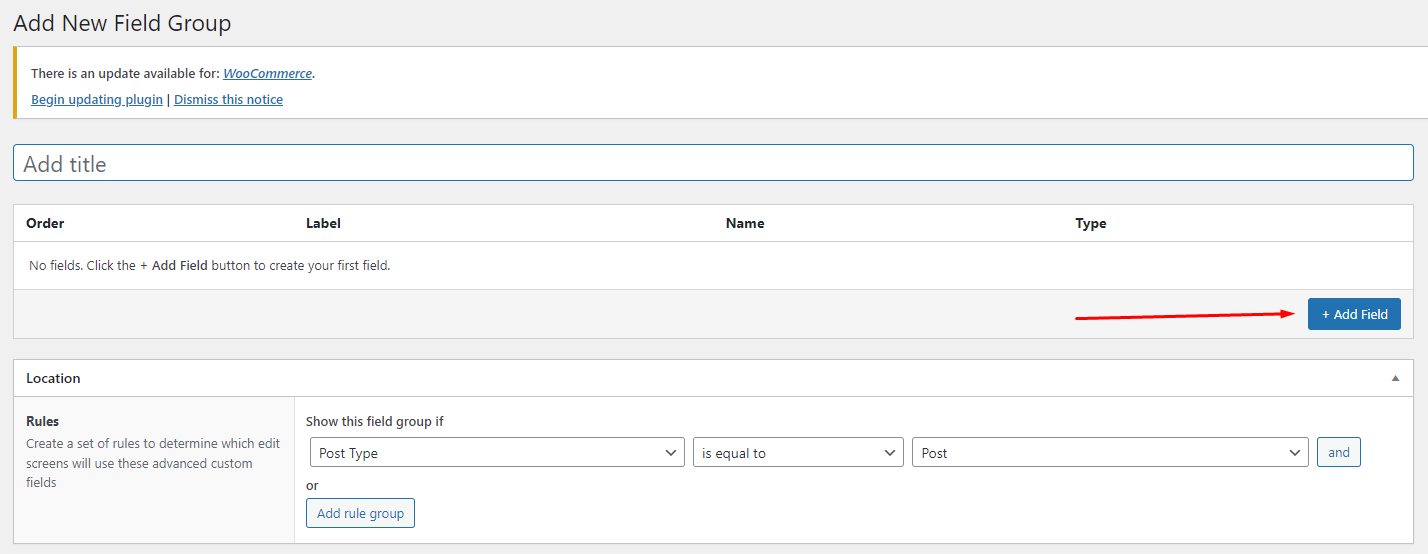
Add Location
You can set location where these fileds are shown by define rule.
"Product plan category" is third level category.

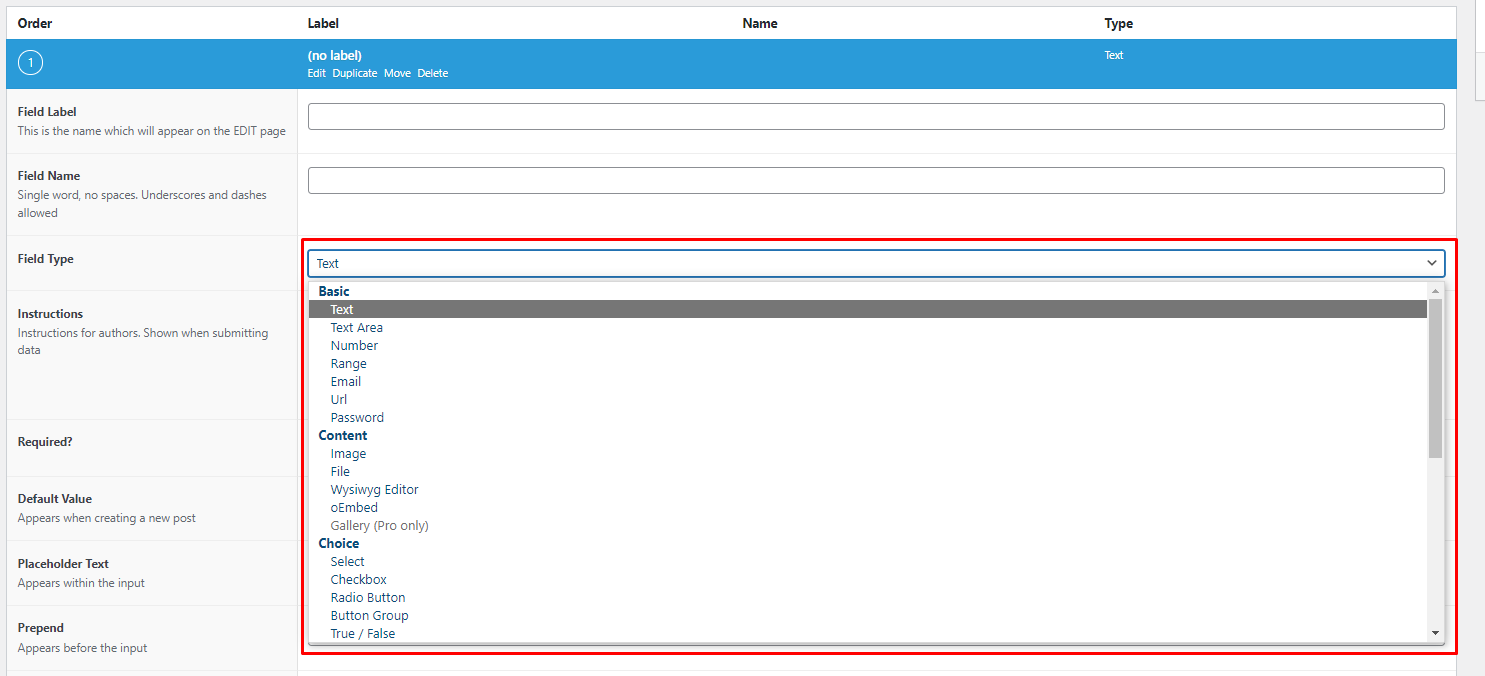
You can selct only following field type as per your requirment.
- Text.
- Textarea.
- Number.
- Email.
- URL.
- Select.
- Checkbox.
- Radio button.
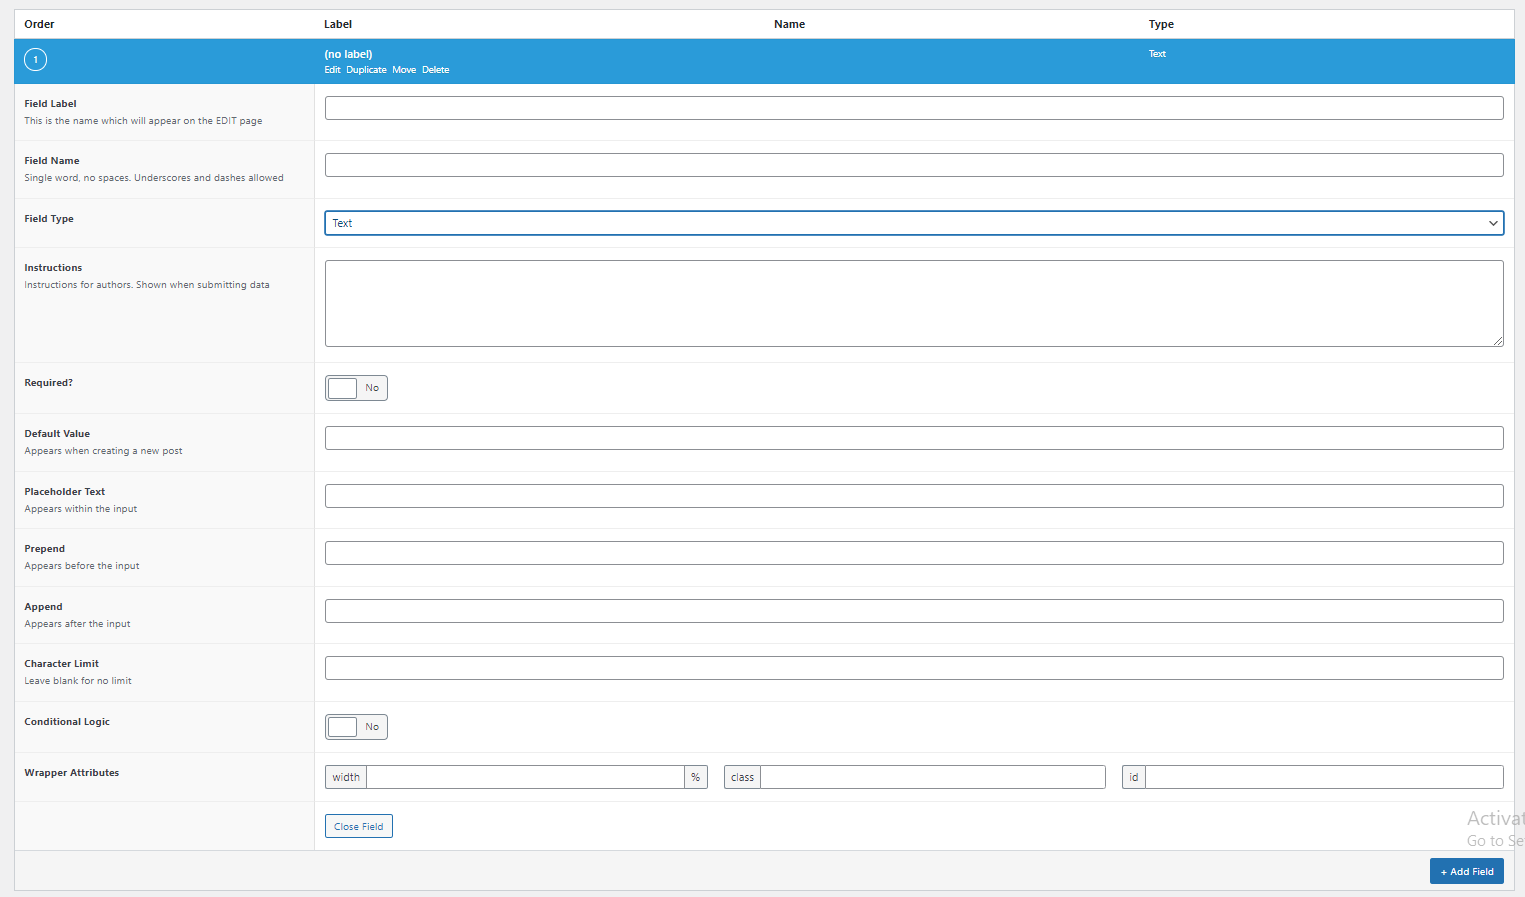
You can add multiple fields in one group field.
- Add field label.
- Add field name.
- You can select the field type.It may be text,textarea,checkbox or radio button, select & many more.
- Add default value.(optional)
- Add placeholder text.(optional)
Email setting - Top
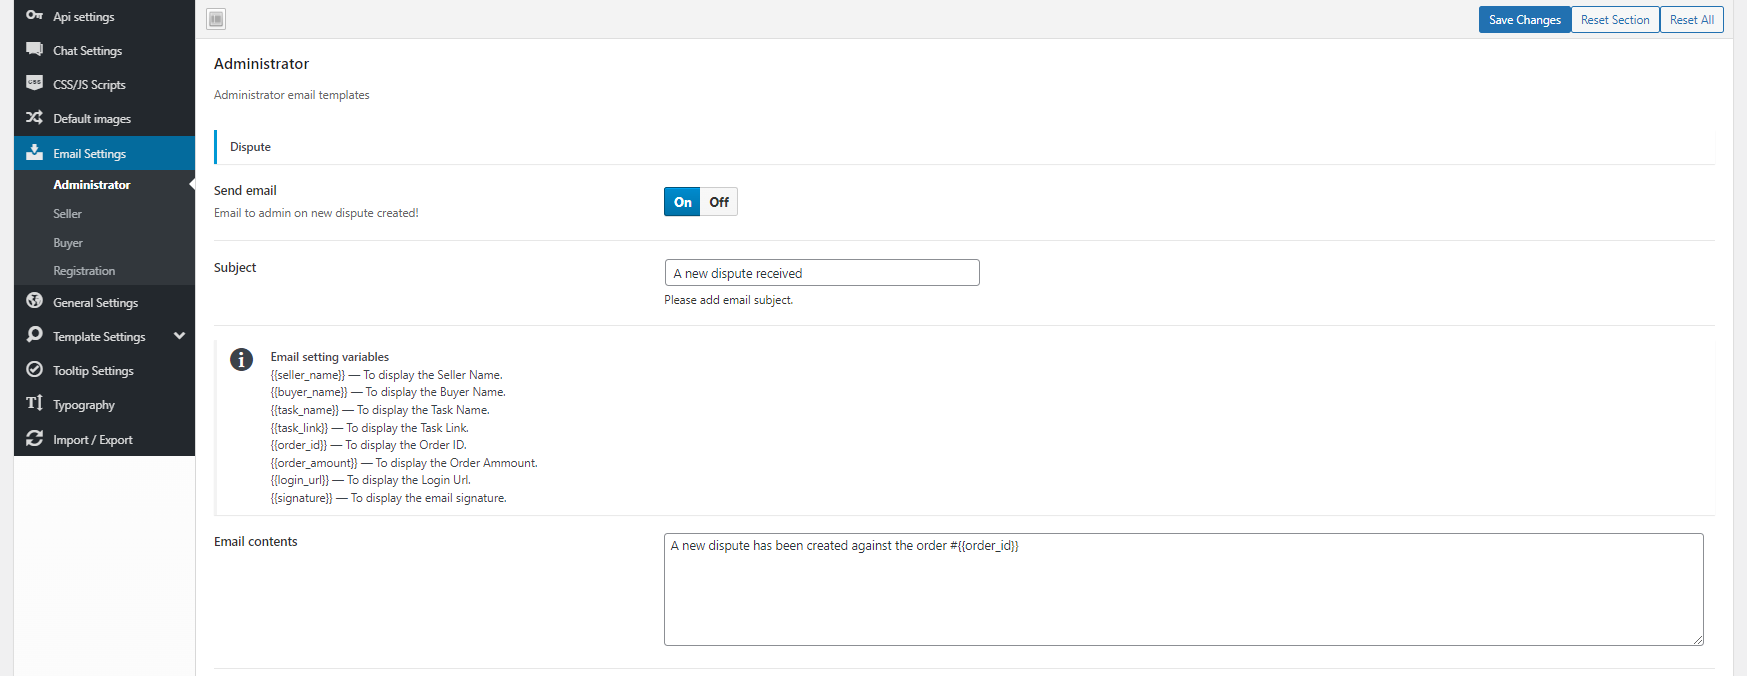
In email settings you can update email basic options and also change the templates of emails for example administrator, seller, buyer and registration templates.
Subject: Here you can add the subject of the email.
Email setting variable: You can use these variables in the text editor (email content).
- {{seller_name}} — To display the seller name.
- {{buyer_name}} — To display the buyer name.
- {{task_name}} — To display the task name.
- {{task_link}} — To display the task link.
- {{order_id}} — To display the order id.
- {{order_amount}} — To display the order ammount.
- {{login_url}} — To display the login url.
- {{signature}} — To display the email signature.
Refund settings - Top
Buyer refund:
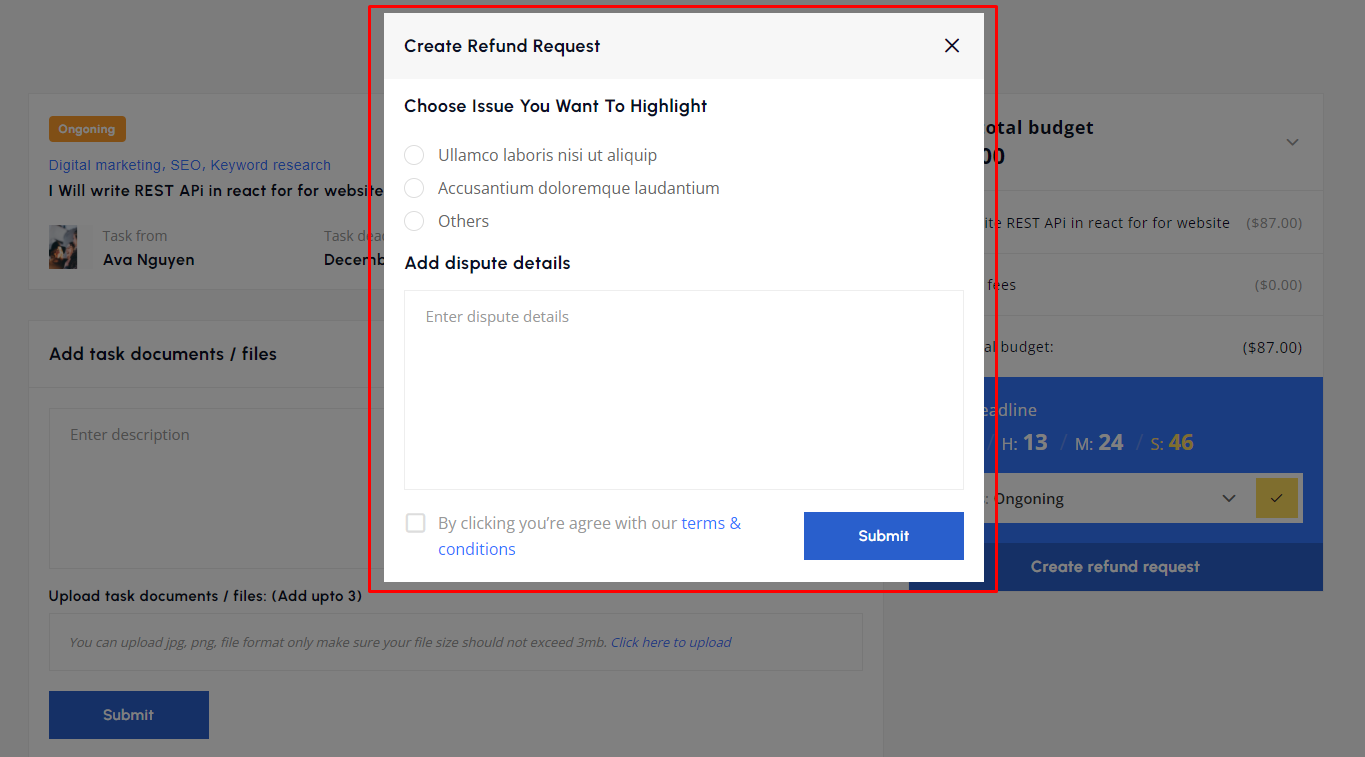
Buyer can create refund request to seller(freelancer).
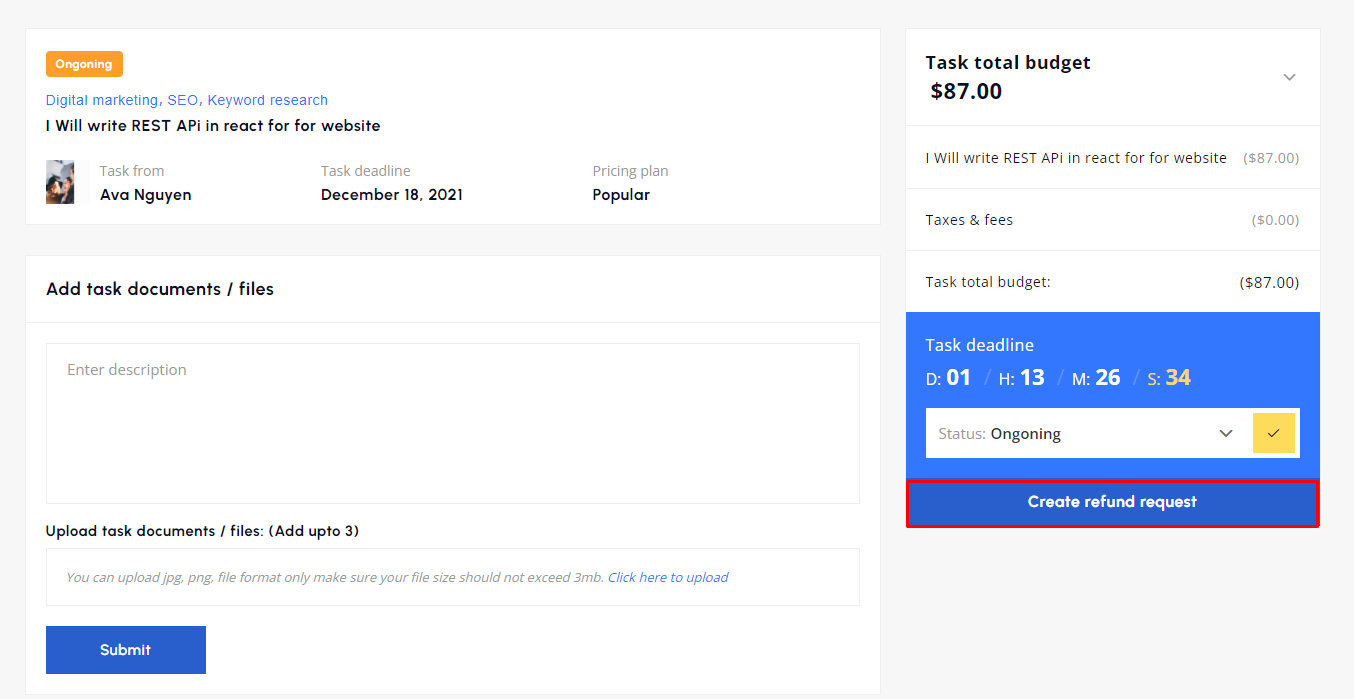
The seller will receive the refund request.He can accept or decline requests.
Seller refund:
The seller will receive the refund request.He can accept or decline requests.
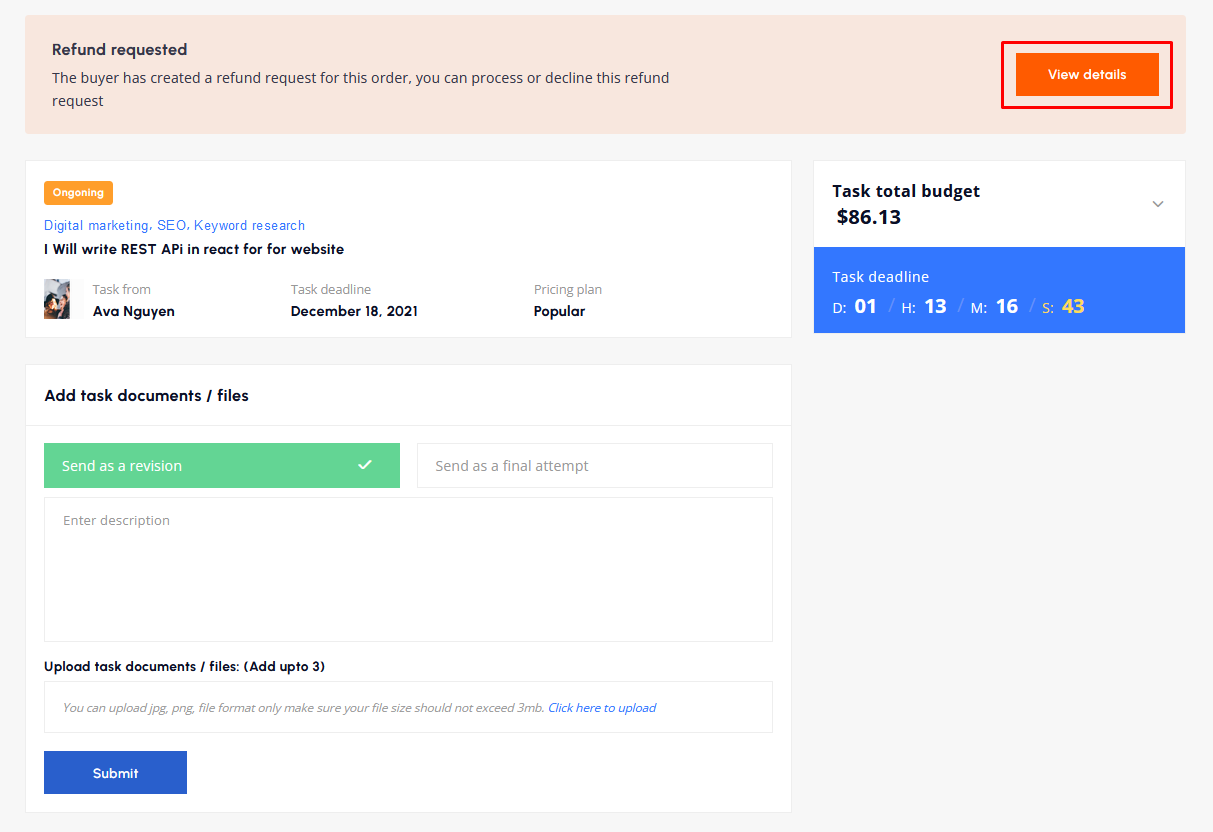
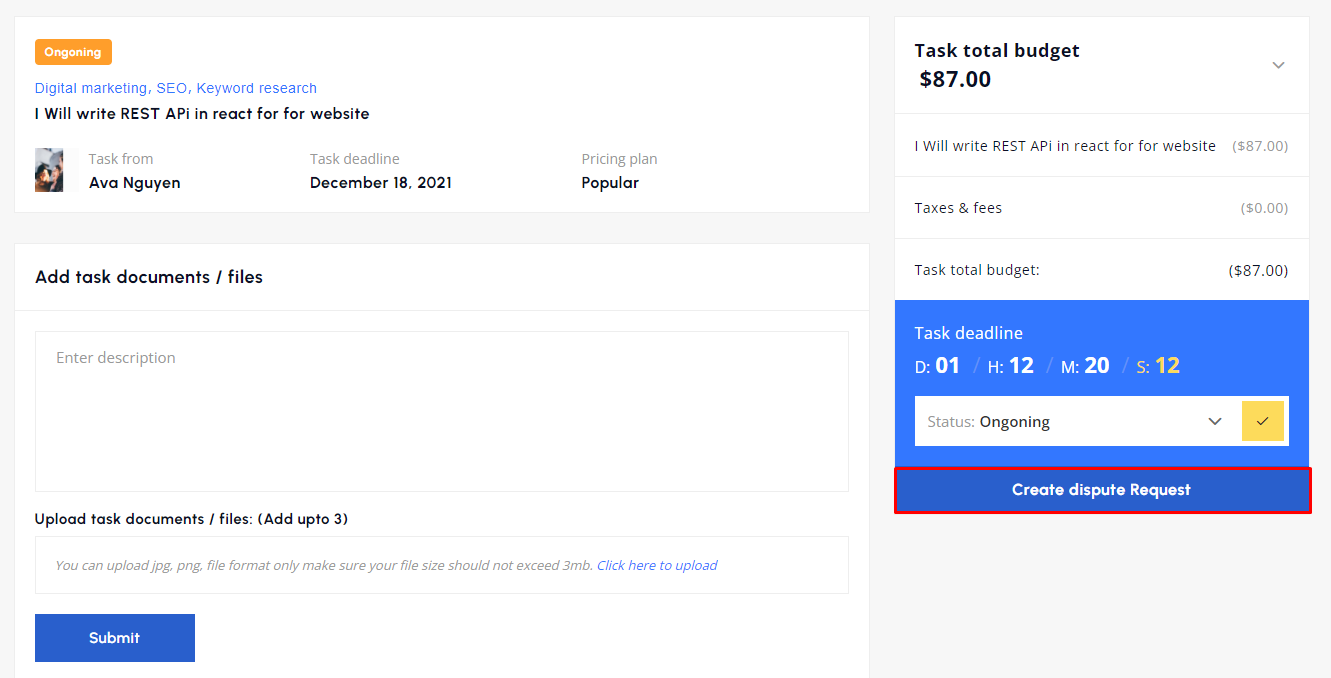
By click on View details you'll land on refund request dispute page shown in image.
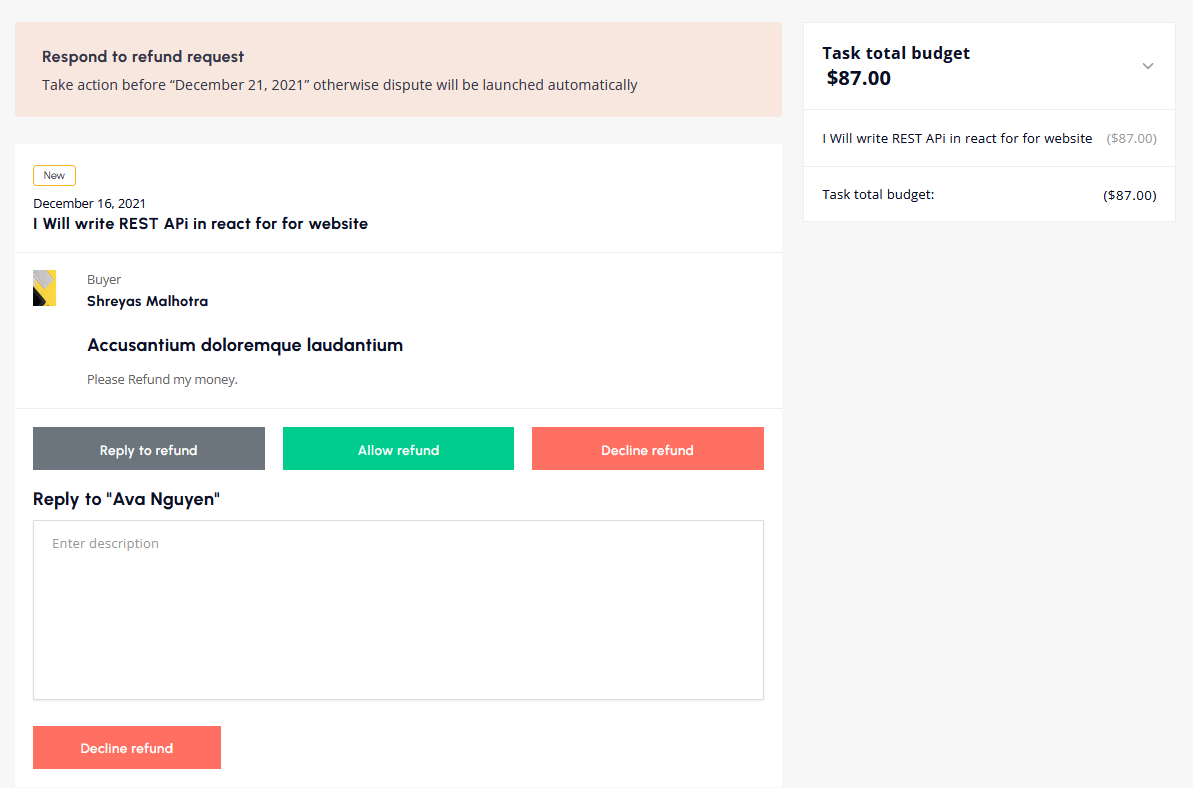
The seller can accept or decline requests or can communicate with buyer.
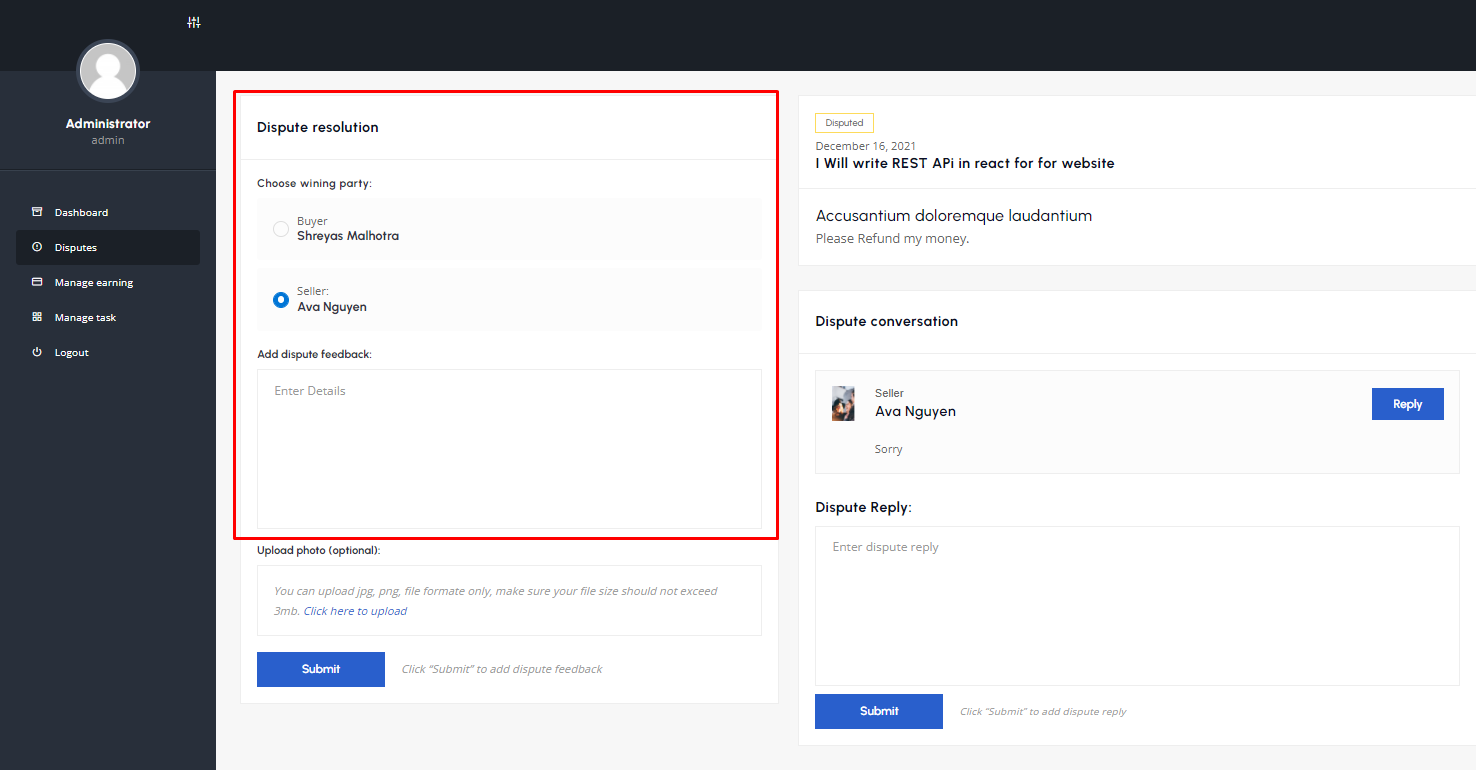
Disputes - Top
When the seller declined a buyer's refund request.Then buyer has the option to create a dispute on it.
View disputes
The seller/buyer can see disputes by following this path shown in image.
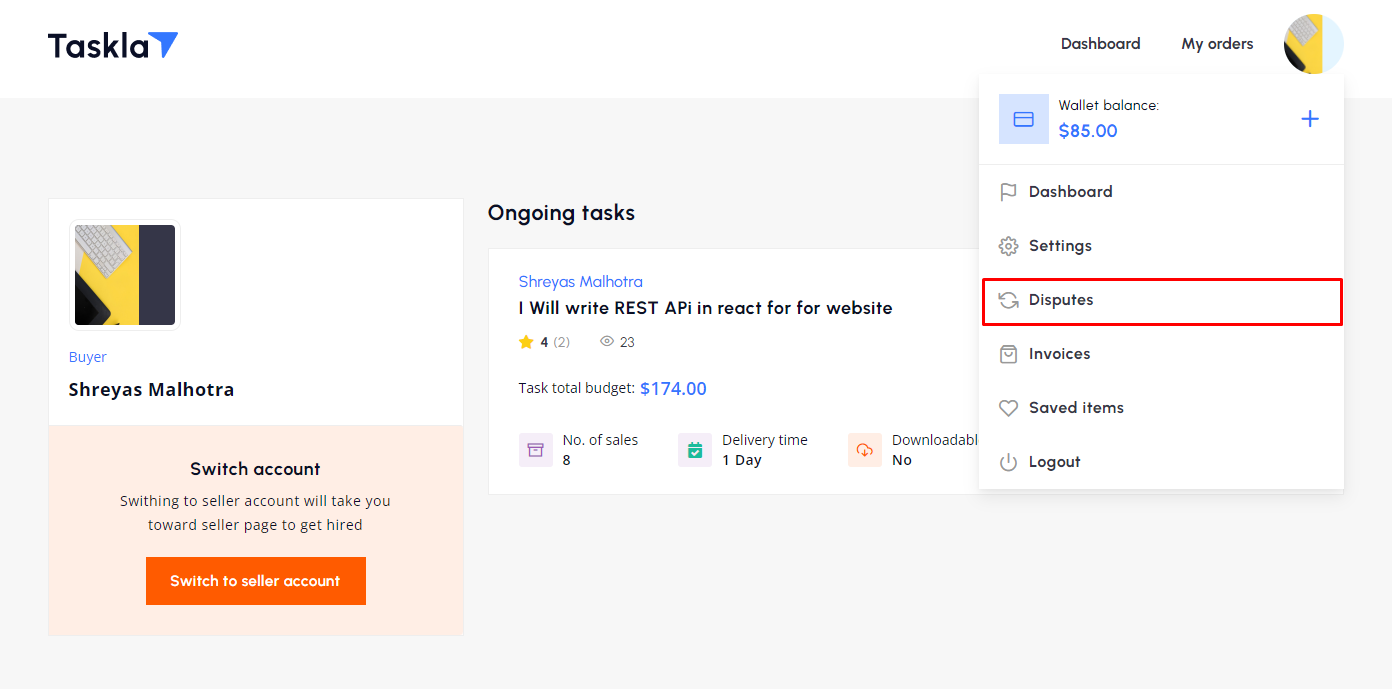
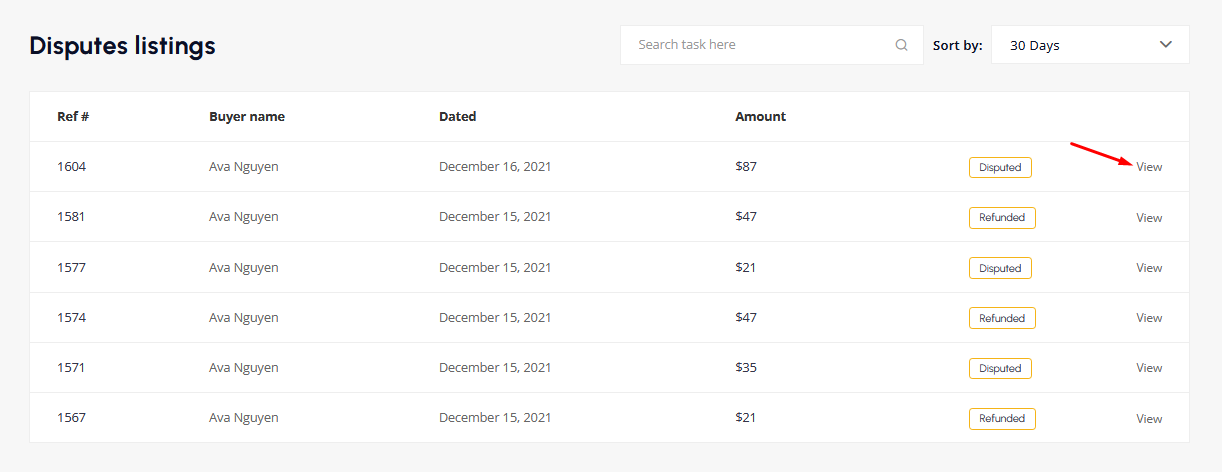
By click on "Disputes" user will land on disputes listing page.
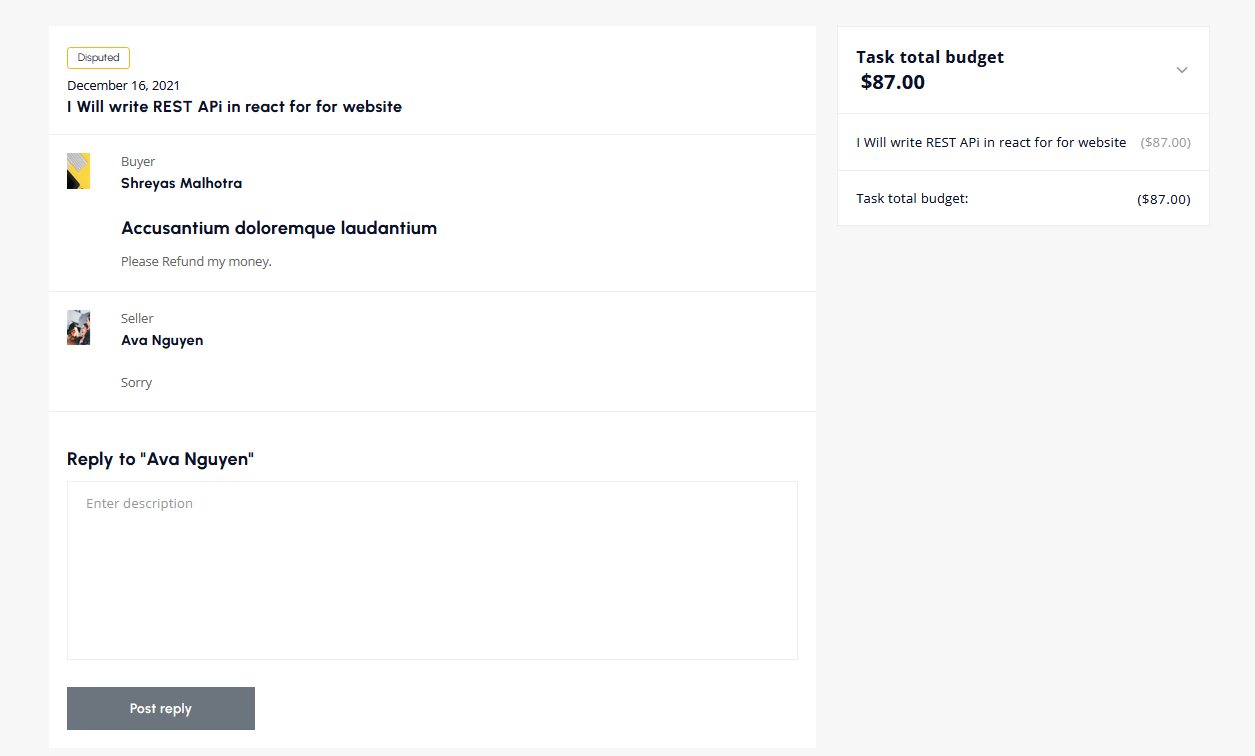
Once disputes are created then the admin will decide who deserves the right favor. In case of the buyer will win then the task amount will refund to his account.On the other hand, if the seller wins then the task amount will be sent to the seller account.
Since version 1.0 - top
Released on 22 December, 2021
- Released Taskbot – A task marketplace WordPress Plugin.